Are you frustrated with Chrome scrolling not working? Don’t worry, we’ve got you covered! This article will provide easy solutions to fix this issue and get your scrolling back on track.
Whether it’s deleting extensions, resetting Chrome, erasing user profile data, or disabling smooth scrolling, we have all the steps you need to follow. We’ll even show you how to use Chrome’s built-in cleaner to ensure a smooth, hassle-free scrolling experience.
If you’ve been experiencing issues with Chrome scrolling, it can be incredibly frustrating. But fear not, because we’re here to help you fix it.
Also Read: 7 Best Ways To Fix Distributedcom Error Windows
One of the first steps you can take is to delete extensions one by one. Sometimes, certain extensions can interfere with Chrome’s scrolling functionality. Removing them one at a time lets you pinpoint the culprit and get your scrolling back to normal.
If that doesn’t work, you can try resetting Chrome, which will revert the browser back to its default settings. Additionally, erasing user profile data or disabling smooth scrolling are other effective solutions that you can try.
And don’t forget to utilize Chrome’s built-in cleaner to ensure a clean and optimized browsing experience.
With these easy solutions, you’ll be scrolling through webpages effortlessly in no time!
Easy Solutions to Fix Chrome Scrolling Not Working
If you’re frustrated with Chrome scrolling not working, there are easy solutions to fix it and get your smooth scrolling back in no time. First, try clearing your browsing data. This can help resolve any temporary issues that may be causing the scrolling problem. Simply go to the Chrome settings, click on ‘Privacy and security,’ and then select ‘Clear browsing data.‘ From there, you can choose to clear your browsing history, cache, and cookies.
Once you’ve done this, restart Chrome and see if the scrolling issue is resolved.
Another easy solution is to disable extensions one by one. Sometimes, certain extensions can interfere with Chrome’s scrolling functionality. To do this, go to the Chrome settings and click on ‘Extensions.’ From there, you can disable each extension individually by toggling the switch. After disabling an extension, check if the scrolling problem persists. If it does, re-enable the extension and move on to the next one. By doing this, you can pinpoint the exact extension that is causing the issue.
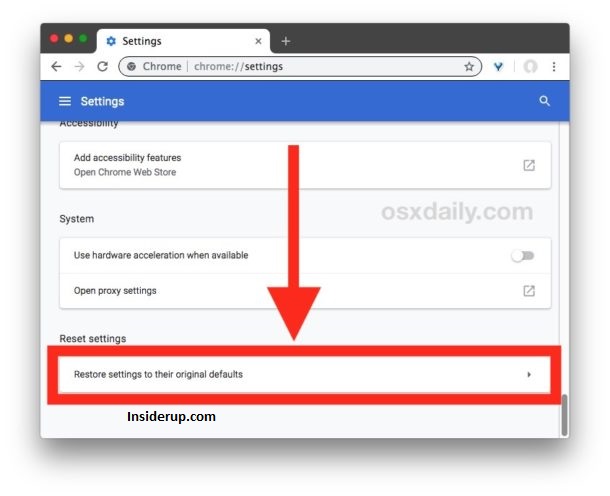
If the above solutions didn’t work, you can try resetting Chrome settings to their default values. This will revert any changes you have made and potentially fix the scrolling problem. To reset Chrome settings, go to the settings menu and click on ‘Advanced.’ Scroll down to the bottom and click ‘Restore settings to their original defaults.’ Confirm the action and let Chrome reset. Once it’s done, check if the scrolling issue is resolved. If not, you can proceed to the next section about deleting extensions individually.
Deleting extensions one by one can help identify and remove any problematic extensions causing the scrolling issue. By following these easy solutions, you can fix Chrome scrolling not working and enjoy smooth scrolling again.
Delete Extensions One by One
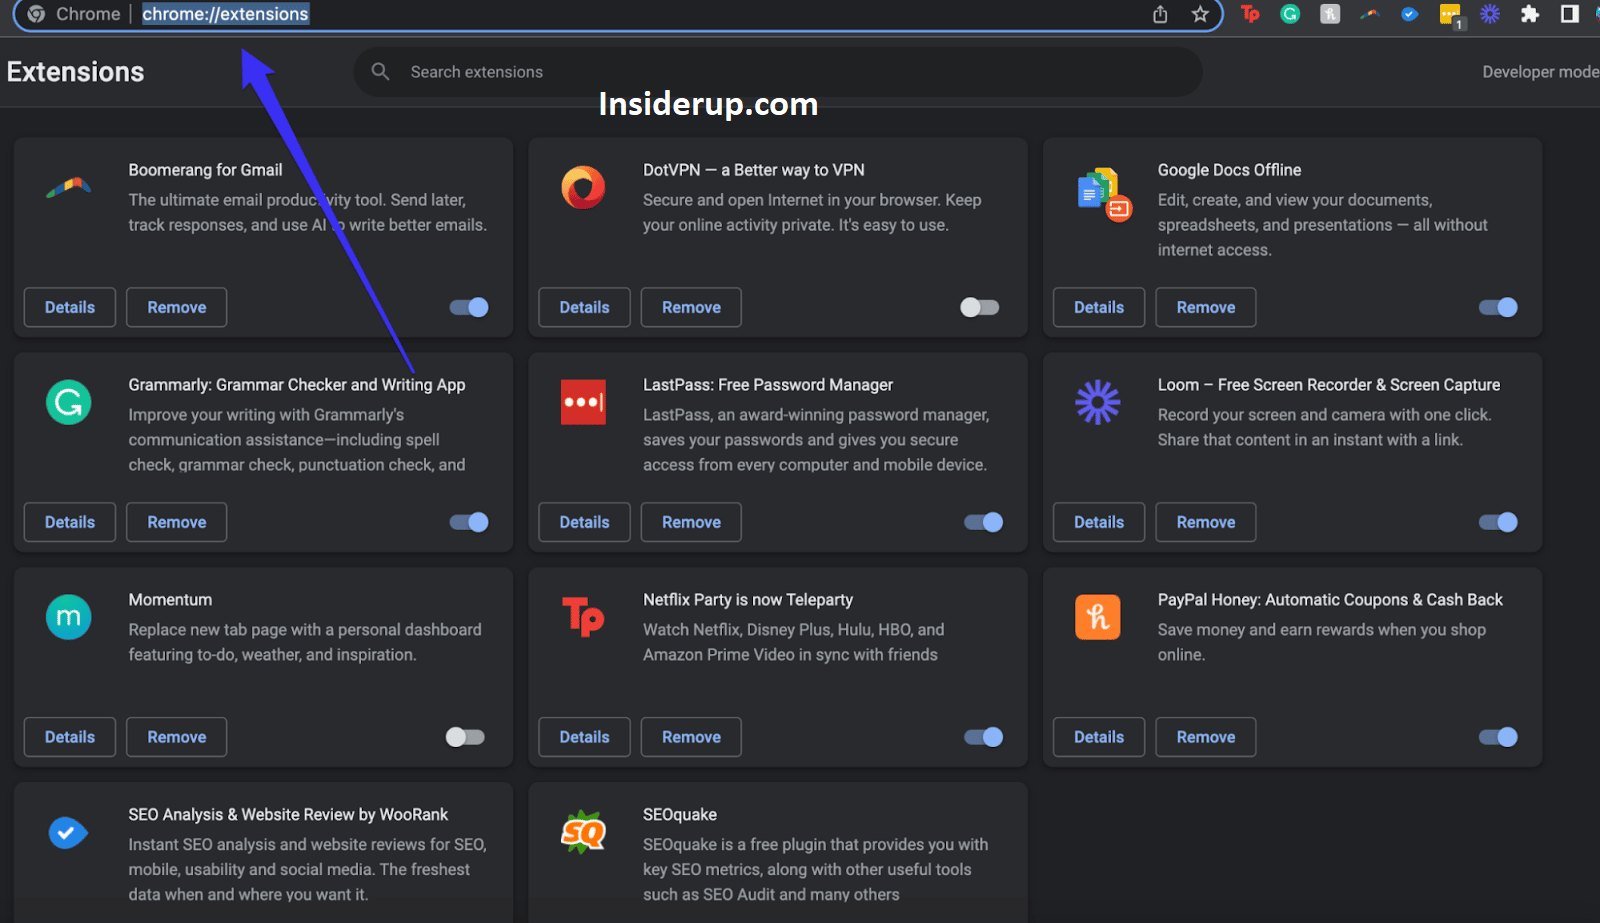
To address the issue, try removing extensions individually to see if it resolves the problem with Chrome scrolling. Sometimes, certain extensions can interfere with the browser’s functionality and cause scrolling problems.
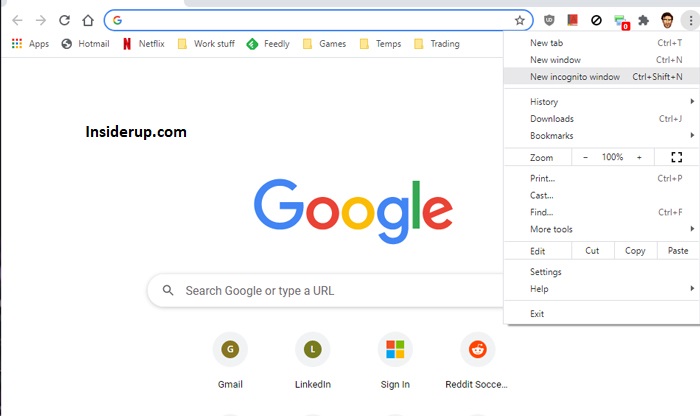
Start by clicking on the three dots in the top right corner of the Chrome window, then select ‘More tools’ and ‘Extensions.’ A list of all your installed extensions will appear.
Take a systematic approach and disable one extension at a time, then test if the scrolling issue still persists. This way, you can identify the problematic extension causing the problem.
– Disable an extension.
– Test if scrolling works properly.
– If the issue persists, re-enable the extension and move on to the next one.
– Repeat the process until you find the extension causing the scrolling problem.
By removing extensions individually and testing the scrolling functionality, you can pinpoint the specific extension causing the issue. Once you have identified the problematic extension, you can either remove it permanently or seek an updated version compatible with your version of Chrome.
If removing the extensions does not fix the scrolling problem, you can proceed to the next step and reset Chrome to its default settings.
Reset Chrome
Ready to give your Chrome browser a fresh start? Resetting Chrome is like hitting the refresh button on your browsing experience, wiping away any pesky issues hindering your scrolling bliss. When you reset Chrome, you restore it to its default settings, erasing any changes you may have made and disabling all extensions. It’s a simple solution that can often fix scrolling problems and other glitches you may be experiencing.
To reset Chrome, follow these steps:
| Step | Action | Description |
| 1 | Open Chrome Settings | Click on the three-dot menu at the top right corner of your browser and select “Settings” from the dropdown menu. |
| 2 | Scroll down and click on “Advanced” | This will expand the settings options and show additional features. |
| 3 | Scroll to the bottom and click on “Restore settings to their original defaults” | A confirmation pop-up will appear. Click on “Reset settings” to proceed. |
Once you’ve reset Chrome, all your browsing data, including cookies, cache, and extensions, will be cleared. This can help resolve any conflicts or compatibility issues that may have been causing the scrolling problem. After resetting, you can go ahead and test if the scrolling issue has been resolved. If not, you can proceed to the next step and erase your user profile data.
Now that you’ve reset Chrome and given it a fresh start, it’s time to take it a step further and erase your user profile data. This will remove any remaining traces of customization or settings that may have been causing the scrolling issue. By doing this, you’ll essentially be starting with a completely clean slate.
Erase the User Profile Data
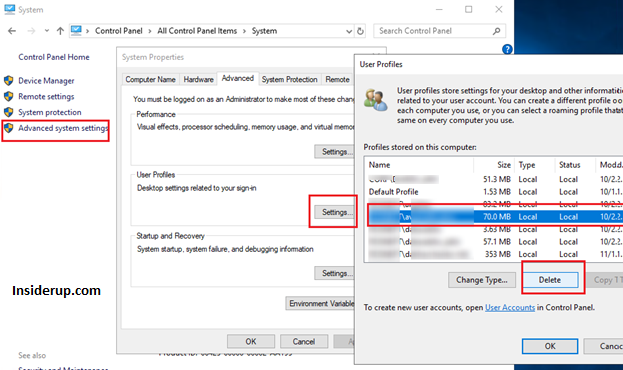
Now that you’ve given Chrome a fresh start, it’s time to completely remove any remaining traces of customization or settings that may be causing the scrolling issue by erasing your user profile data. This step will ensure you start with a clean slate and eliminate potential conflicts. Don’t worry, erasing your user profile data won’t delete your bookmarks or saved passwords, as those are stored separately. Here are five things you can do to erase your user profile data:
– Open Chrome and click the menu button (three dots) in the top-right corner.
– Select ‘Settings’ from the dropdown menu.
– Scroll down and click on ‘Advanced’ to expand the settings.
– Under the ‘Privacy and security’ section, click on ‘Clear browsing data.’
– In the popup window, select the ‘Advanced’ tab and choose ‘All time’ from the time range dropdown. Then, check the box next to ‘Browsing history,’ ‘Cookies and other site data,’ and ‘Cached images and files.’ Finally, click on ‘Clear data’ to erase your user profile data.
With your user profile data erased, you’ve taken a significant step towards resolving the scrolling issue in Chrome. Now, let’s move on to the next section, discussing how to disable smooth scrolling.
Disable Smooth Scrolling
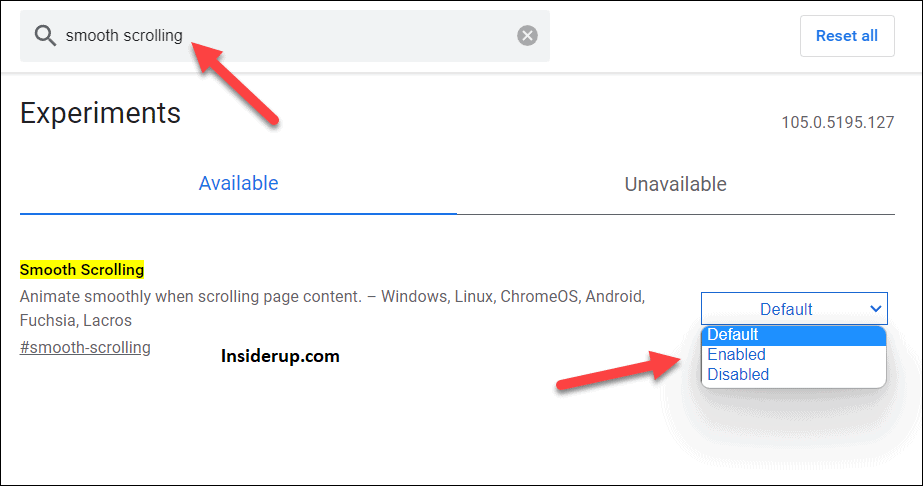
With your user profile data erased, you can take control of your scrolling experience by disabling smooth scrolling. Smooth scrolling is a feature in Google Chrome that provides a seamless and fluid experience. However, it may not always work as intended and can cause scrolling issues. By disabling smooth scrolling, you can potentially resolve any scrolling problems you may be experiencing.
To disable smooth scrolling, open Google Chrome and type ‘chrome://flags’ in the address bar. This will take you to the Chrome Experiments page. Scroll down until you find the option for ‘Smooth Scrolling.’ Click on the drop-down menu next to it and select ‘Disabled.’ Once you’ve disabled smooth scrolling, restart your browser for the changes to take effect.
Now that you’ve disabled smooth scrolling, you can move on to optimizing your Chrome browsing experience: using Chrome’s built-in cleaner. This feature allows you to remove unnecessary files and data that may be causing performance issues. By using Chrome’s cleaner, you can ensure that your browser is running smoothly and efficiently.
How to Use Chrome’s Built-in Cleaner
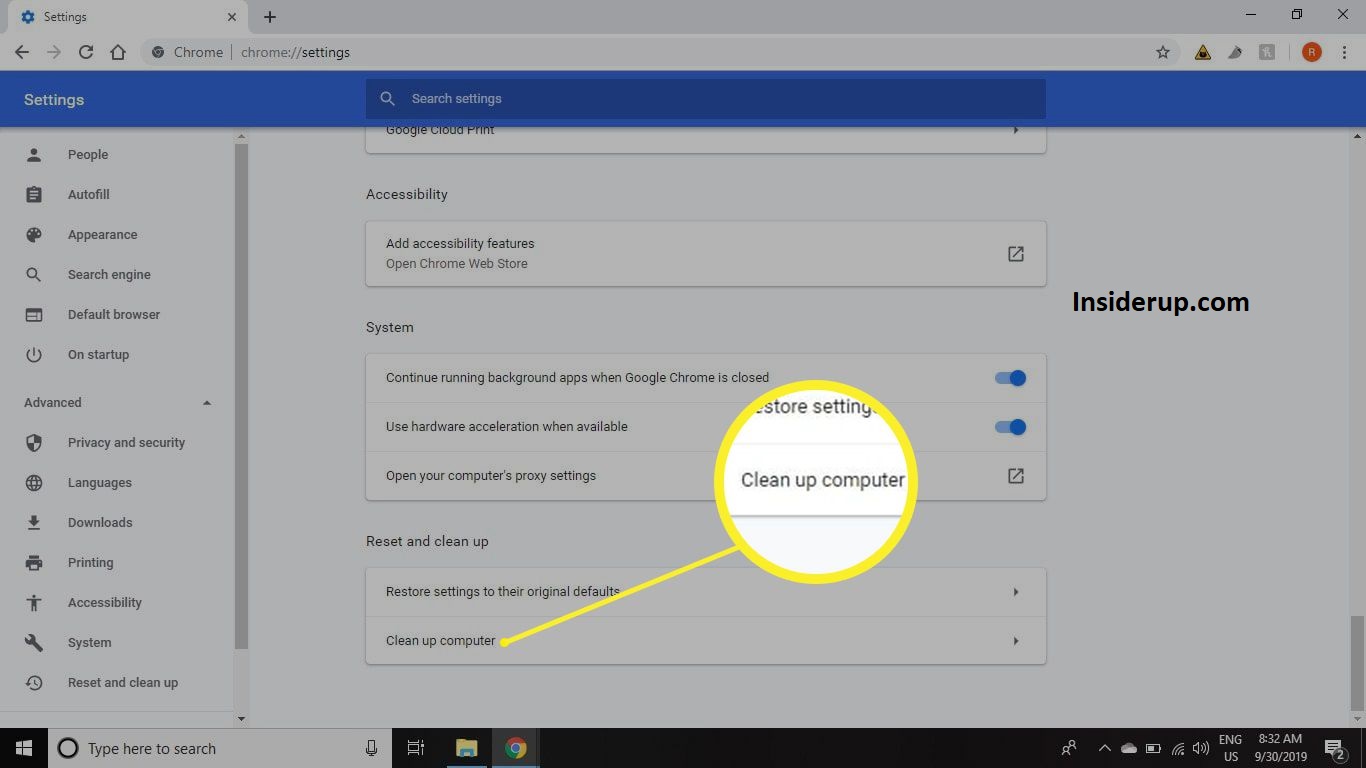
To optimize your browsing experience, let’s dive into how to utilize Chrome’s built-in cleaner, a powerful tool to declutter and enhance your browser’s performance.
Chrome’s built-in cleaner is designed to help you easily remove unnecessary files and data that can slow down your browsing speed. By regularly using this tool, you can free up valuable disk space and improve the overall performance of your browser.
Here are three steps to effectively use Chrome’s built-in cleaner:
- Open Chrome’s settings by clicking on the three vertical dots in the top-right corner of the browser window and selecting ‘Settings’ from the dropdown menu.
- Click on the ‘Advanced’ option to reveal additional settings.
- Under the ‘Privacy and security’ section, click ‘Clear browsing data.’ This will open a new tab where you can select the types of data you want to delete. You can clear browsing history, download history, cookies, and cached images and files. Select the time range to delete the data, and then click on the ‘Clear data’ button.
Following these steps, you can easily utilize Chrome’s built-in cleaner to declutter and optimize your browsing experience. Regularly clearing unnecessary files and data will improve your browser’s performance and enhance your online privacy and security. Try it and enjoy a faster and smoother browsing experience with Chrome.
Frequently Asked Questions
1. How Do I Check if Chrome Scrolling is Not Working on My Device?
If you feel like you’re swimming against a strong current when trying to scroll on Chrome, it’s time to check if your scrolling isn’t working on your device. You can do this by simply trying to scroll up and down on any webpage and seeing if it responds accordingly.
If you notice that the pages aren’t moving as smoothly as they should or aren’t moving at all, then it’s clear that your Chrome scrolling isn’t working. Don’t worry though, there are some easy solutions to fix this frustrating issue.
2. Can I Fix Chrome Scrolling Not Working Issue by Updating My Browser?
Yes, you can fix the issue of Chrome scrolling not working by updating your browser.
Updating your browser to the latest version can often resolve various bugs and glitches, including scrolling problems.
It is recommended to regularly check for updates and install them to ensure you have the most up-to-date version of Chrome.
Doing so can increase the likelihood of resolving the scrolling issue and improving your overall browsing experience.
3. Is There a Way to Fix Chrome Scrolling Not Working Without Deleting All My Extensions?
To fix the issue of Chrome scrolling not working without deleting all your extensions, there’s a simple solution for you. Did you know that approximately 2 billion people worldwide use Google Chrome as their preferred web browser?
Now, let’s get back to the problem at hand. You can try disabling hardware acceleration in Chrome settings, which often resolves scrolling issues. To do this, go to the settings menu, click on ‘Advanced,’ and under ‘System,’ turn off the toggle for ‘Use hardware acceleration when available.’
Hopefully, This should fix the scrolling problem without removing any extensions. Give it a try and enjoy smooth scrolling on your Chrome browser!
4. Will Resetting Chrome Remove All My Bookmarks and Saved Passwords?
Resetting Chrome will remove all your bookmarks and saved passwords.
5. How Can I Determine if Smooth Scrolling is Causing the Scrolling Issue in Chrome?
To determine if smooth scrolling is causing the scrolling issue in Chrome, you can try disabling smooth scrolling and see if the problem persists.
To do this, go to the Chrome settings by clicking on the three-dot menu in the top right corner of the browser window and selecting ‘Settings.’
Then, scroll down and click on ‘Advanced’ to expand the advanced settings.
Under the ‘System’ section, you will find the option to disable smooth scrolling.
Toggle off the switch next to ‘Use hardware acceleration when available’ and restart Chrome.
If the scrolling issue is resolved after disabling smooth scrolling, then it is likely that smooth scrolling was the cause.
Conclusion
In conclusion, fixing the issue of Chrome scrolling not working is easier than you think. You can regain control of your browsing experience by following these simple steps.
First, delete extensions one by one to identify the culprit.
Next, reset Chrome to its default settings, ensuring a fresh start.
If that doesn’t work, erase the user profile data, eliminating any potential conflicts.
Lastly, disable smooth scrolling to improve performance.
By implementing these easy solutions, you can overcome the frustration of Chrome scrolling not working. Take charge of your browsing experience and enjoy seamless scrolling once again.
Don’t let technical glitches hinder your productivity or enjoyment. With a few clicks and adjustments, you can restore the smoothness and efficiency you deserve.
So, don’t wait any longer – follow these steps and get back to surfing the web effortlessly. Your browsing experience will thank you for it.