
Are you tired of encountering the DistributedCOM error on your Windows system? Don’t worry; we’ve got you covered! In this article, we will explore the seven best ways to fix the DistributedCOM error and get your system up and running smoothly again.
The DistributedCOM (DCOM) error is commonly encountered on Windows systems. It occurs when there are problems with communication between different components of your operating system. This error can lead to issues such as application crashes, slow system performance, and even design freezes.
Also Read: 10 Best Ways To Fix Your Connection Is Not Private Chrome
However, with the right troubleshooting steps, you can quickly fix this error and prevent it from causing further disruptions to your workflow. In the following paragraphs, we will guide you through the seven best methods to resolve the DistributedCOM error on your Windows system.
What is the Distributedcom Error?
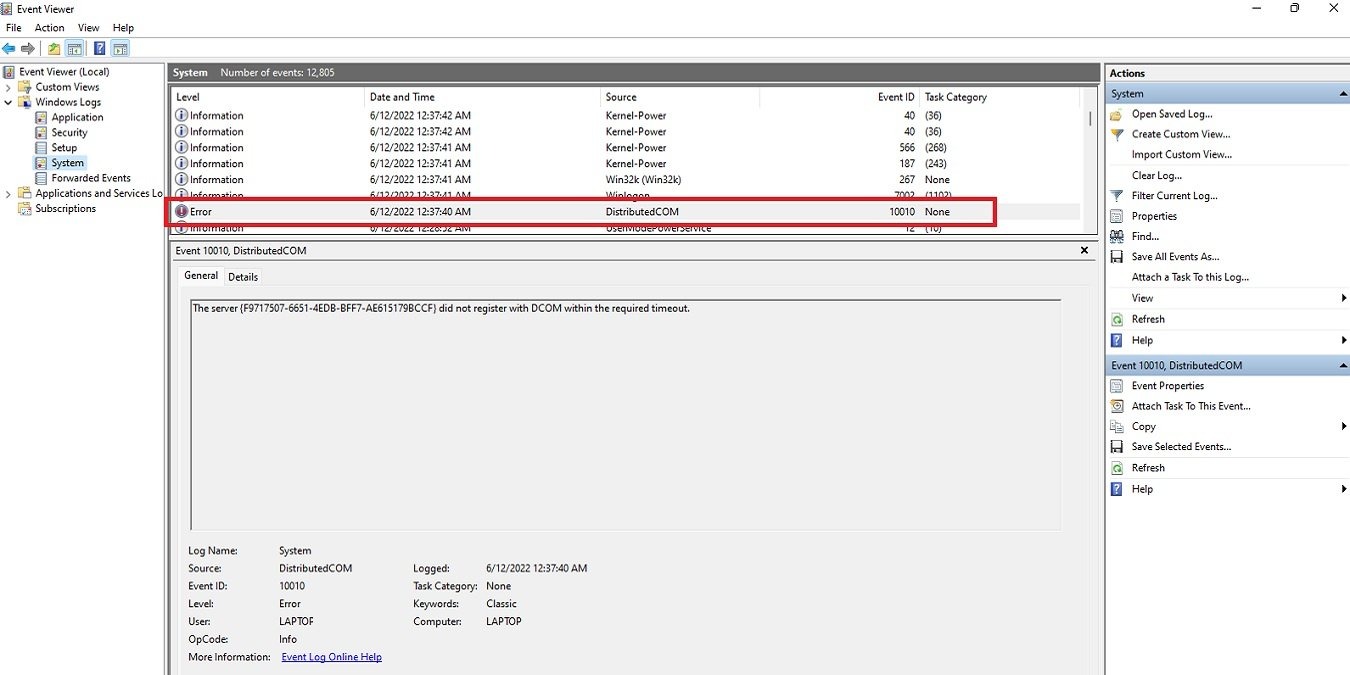
The DistributedCOM error, often encountered by Windows users, can be a frustrating issue that requires prompt attention to prevent potential system instability. This error occurs when the Distributed Component Object Model (DCOM) fails to communicate with a specific application or service. It can manifest in various ways, such as error messages, system crashes, or the inability to access certain features or applications.
Understanding the nature of the DistributedCOM error is essential in finding the best ways to fix it and prevent further complications.
One common type of DistributedCOM error is the ‘DCOM Server Process Launcher Service Failed to Start’ error. This error typically occurs when the DCOM Server Process Launcher (DcomLaunch) service fails to start properly. A corrupted or missing system file, an incompatible software conflict, or a misconfigured Windows service can cause this.
To resolve this issue, you can try restarting the DcomLaunch service, performing a system file check to repair any corrupted files, or disabling any conflicting software or services that may interfere with the DcomLaunch service.
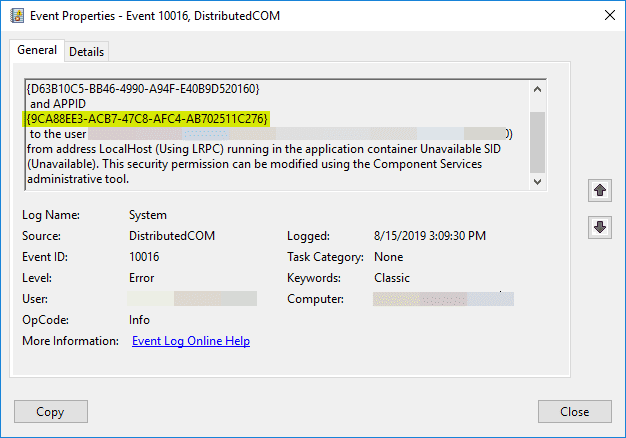
Another type of DistributedCOM error is the ‘DistributedCOM Error 10016’ error. This error is commonly associated with permissions issues, specifically with the ‘Local Activation’ or ‘Local Launch’ permissions for a specific application or service. To fix this error, you can modify the permissions using the Component Services tool, which allows you to grant the necessary licenses to the affected application or service. It’s important to note that modifying permissions should be done cautiously, as it can potentially compromise system security if not done correctly.
Understanding the different types of DistributedCOM errors is crucial in effectively resolving them. You can narrow down the troubleshooting steps and find the best solution by identifying the specific error code or message associated with the DistributedCOM error.
The subsequent section will delve deeper into the various types of distributed com errors (codes), providing the knowledge to tackle these issues head-on and restore your Windows system to its optimal functionality.
Types of Distributedcom Errors (Codes)
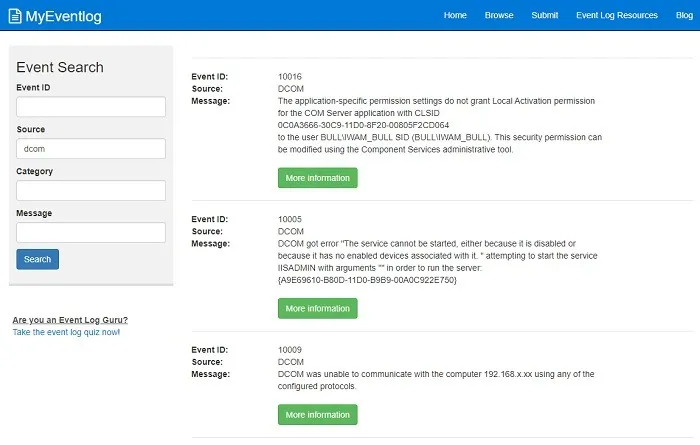
One common type of DistributedCOM error code is 0x80070005, which often occurs due to insufficient permissions. This error code indicates that the application or service is trying to access a COM object without the necessary permissions. Various factors, such as incorrect configuration settings, malware infections, or conflicts with other software can cause it. Understanding the different types of DistributedCOM errors can help you troubleshoot and resolve the issue more effectively.
| Error Type | Error Code | Description |
| Access Denied | 0x80070005 | The requested operation was denied. Typically occurs when the caller does not have the necessary permissions to perform the requested DCOM operation. |
| Timeout | 0x800706BA | The DCOM operation timed out while waiting for a response from the remote machine. |
| Unavailable | 0x800706BA | The requested DCOM server is not available. Possible reasons include network connectivity issues or the DCOM server is not running. |
| Authentication Failure | 0x800706BE | The DCOM server failed to authenticate the user, typically due to incorrect credentials being provided. |
| Firewall Blocking DCOM Communication | 0x800706D9 | The Windows Firewall or a third-party firewall is blocking the necessary DCOM communication, preventing the operation from succeeding. |
| Invalid Class String | 0x800401F3 | The specified COM class identifier (CLSID) is invalid or cannot be found. This error may occur when trying to instantiate a COM object. |
| Unknown Error | Varies | This represents an unknown or unspecified DCOM error. The error code may vary depending on the specific issue encountered. |
To help you better understand the types of DistributedCOM errors, here are five common error codes and their meanings:
– 0x80070005: This error code indicates insufficient permissions and is often caused by the application or service not having the necessary rights to access a COM object.
– 0x80070002: This error code signifies that the specified file or directory could not be found. It may occur if the system files related to COM objects are missing or corrupted.
– 0x80070003: This error code suggests the specified path could not be found. It can occur due to incorrect file paths or missing files required by the COM object.
– 0x80070006: This error code indicates an invalid handle. It may occur if there are issues with the COM object’s handle or if it is misused.
– 0x8000401A: This error code signifies that the COM object being accessed is incorrectly registered. It can occur if the COM object’s registration information is missing or corrupted.
Understanding these error codes can help you diagnose the root cause of the DistributedCOM error and take appropriate steps to fix it.
Now, let’s move on to the next section to learn how to resolve the DistributedCOM error and prevent it from recurring.
Without further ado, let’s dive into the next section to learn how to fix the DistributedCOM error.
How to Fix the Distributedcom Error

To effectively resolve the DistributedCOM error, you can employ a few simple techniques.
First, you can try resetting the local COM permissions for the application or service that’s causing the error. To do this, open the Component Services window by searching for ‘Component Services’ in the Start menu. Then, navigate to the ‘Computers’ folder, followed by the ‘My Computer folder, and finally, the ‘DCOM Config’ folder. Locate the application or service that’s causing the error, right-click on it, and select ‘Properties’.
In the Properties window, go to the ‘Security’ tab and click on the ‘Edit’ button under ‘Launch and Activation Permissions’. From there, you can grant the necessary permissions to the application or service.
Another technique you can try is to use the Component Services window to change the identity of the application or service. Sometimes, the DistributedCOM error can be caused by issues with the user account under which the application or service is running. To change the identity, follow the steps mentioned before to open the Component Services window and locate the application or service. Right-click on it and select ‘Properties’.
In the Properties window, go to the ‘Identity’ tab and choose a different user account to run the application or service. Make sure to select a statement with the necessary permissions.
If the above techniques don’t work, you can also try reinstalling the application or service that’s causing the DistributedCOM error. Sometimes, the error can be triggered by a corrupt or missing file related to the application or service. By reinstalling it, you can ensure that all the necessary files are present and in the correct locations. After reinstalling, restart your computer and check if the error is resolved. If not, you may need further assistance or explore other solutions.
Overall, these techniques can help you effectively fix the DistributedCOM error and ensure smooth operation of your Windows system without any disruptions.
7 Best Ways to Fix Distributedcom Error Windows
You can easily resolve the DistributedCOM error in Windows by following these simple techniques. First, you can try running the Component Services tool, which allows you to manage and configure COM components and applications. To do this, press the Windows key + R to open the Run dialog box, then type ‘dcomcnfg’ and hit Enter.
In the Component Services window, navigate to Component Services > Computers > My Computer > DCOM Config. Here, you can find and right-click on the application that’s causing the error, go to Properties, and make sure the necessary permissions are set correctly.
Another effective way to fix the DistributedCOM error is by disabling or removing the problematic application or service. To do this, go to the Control Panel and click on ‘Uninstall a program’ or ‘Programs and Features’ depending on your Windows version. Look for the application or service that’s associated with the error and uninstall it. If you can’t uninstall it, you may try temporarily disabling it to see if the error disappears. This can be done by going to the Task Manager, navigating to the Startup tab, and disabling the application or service from running at startup.
Updating Windows is also crucial in resolving the DistributedCOM error. Microsoft regularly releases updates that address various system issues and bugs, including compatibility issues with COM components. To install Windows updates, go to the Start menu, click on Settings, and select ‘Update & Security’. From there, click on ‘Check for updates’ and let Windows search for available updates. Once the updates are found, click on ‘Install now’ and follow the on-screen instructions. Updating Windows can often fix the DistributedCOM error by ensuring your system has the latest bug fixes and compatibility improvements.
By following these techniques, you can easily resolve the DistributedCOM error in Windows. Running the Component Services tool, disabling or removing the problematic application or service, and installing Windows updates are effective ways to fix this error. Now, let’s move on to the next section about installing Windows updates further to enhance the stability and performance of your system.
1. Install Windows Updates
Updating your Windows operating system is crucial for enhancing system stability and performance. One of the best ways to fix the DistributedCOM error in Windows is to install the latest Windows updates. These updates not only provide important security patches but also include bug fixes and improvements to various system components.
To install Windows updates, follow these steps:
- Open the Windows Update settings: Go to the Start menu, click on the Settings icon, and then select ‘Update & Security.’
- Check for updates: Click on the ‘Check for updates’ button. Windows will then search for available updates for your system.
- Install the updates: If any updates are found, click the ‘Install’ button to begin the installation process. Ensure your computer is connected to the internet, as the updates will be downloaded from Microsoft servers.
Regularly updating your Windows operating system ensures that your system is equipped with the latest fixes and improvements. This can help resolve the DistributedCOM error and prevent other issues from occurring.
Once you have installed the updates, you can disable your antivirus to troubleshoot the error temporarily.
Transition: Now that you’ve updated your Windows operating system, the next step is to disable your antivirus software temporarily.
2. Temporarily Disable Your Antivirus
Once you’ve completed the Windows updates, it’s essential to temporarily disable your antivirus software to continue troubleshooting the issue without any interference. Antivirus programs are designed to protect your computer from potential threats, but they can sometimes interfere with the proper functioning of specific applications or processes. By temporarily disabling your antivirus software, you can ensure that it is not causing any conflicts with the DistributedCOM error you are experiencing.
To help you understand the process of temporarily disabling your antivirus software, here is a table outlining the steps for some popular antivirus programs:
| Antivirus Program | Steps to Disable |
| Windows Defender | 1. Open Windows Security by clicking the shield icon in the taskbar.<br>2. Select “Virus & threat protection”.<br>3. Click on “Manage settings” under the “Virus & threat protection settings” section.<br>4. Turn off the “Real-time protection” toggle switch. |
| McAfee | 1. Right-click on the McAfee icon in the system tray.<br>2. Select “Open McAfee”.<br>3. Click on “Virus and Spyware Protection”.<br>4. Click on “Real-Time Scanning”.<br>5. Click on “Turn Off”. |
| Norton | 1. Open the Norton antivirus program.<br>2. Go to “Settings”.<br>3. Select “Antivirus”.<br>4. Turn off the “Auto-Protect”feature.<br>5. Choose the duration to disable the antivirus. |
Once you have successfully disabled your antivirus software, you can proceed with troubleshooting the DistributedCOM error. However, it’s important to ensure you actually have permission to make changes to the affected components. This will allow you to address any underlying issues and help resolve the error effectively.
3. Ensure You Actually Have Permission

Now that you’ve temporarily disabled your antivirus, it’s time to make sure you actually have permission to fix the DistributedCOM error. Sometimes, the error occurs because your user account doesn’t have the necessary privileges to change the system.
To resolve this, you must ensure you’re logged in as an administrator or have administrative rights on your computer. To check if you have administrative rights, go to the Control Panel and click on the User Accounts option.
From there, you can see which type of account you have. You’re good to go if it says ‘Administrator’ next to your account name. However, if it says ‘Standard User’ or something similar, you must change your account type to an administrator account.
To do this, click on your account and select the ‘Change account type’ option. From there, choose the ‘Administrator’ option and click ‘Change Account Type’ to confirm the changes.
Once you have administrative rights, you can proceed to fix the DistributedCOM error and prevent it from occurring again.
Now that you’ve ensured you have the necessary permission to fix the DistributedCOM error, it’s time to bypass it altogether. This will prevent any further disruptions caused by the error and ensure a smooth functioning of your Windows system.
So, let’s move on to the next section and learn how to bypass the error without any hassle.
With the administrative rights sorted, let’s now bypass the error and ensure a seamless Windows experience.
4. Bypass the Error
To ensure a seamless Windows experience, you can easily bypass the DistributedCOM error by following these simple steps. First, open the Start menu and type ‘dcomcnfg’ in the search bar. Press Enter and the Component Services window will open. In this window, navigate to Component Services > Computers > My Computer. Right-click on My Computer and select Properties.
Next, go to the COM Security tab and click on the Edit Limits button under the Access Permissions section. A new window will open where you need to grant the necessary permissions. Make sure that the Local Activation option is checked and click on the Add button. In the Select Users or Groups window, type ‘Everyone’ and click on the Check Names button. Once you see ‘Everyone’ underlined, click OK to add it to the list of users and groups.
After granting the necessary permissions, click OK on all the windows to close them. Now, you can proceed to edit the registry to fix the DistributedCOM error without any hassle. This error can be frustrating, but by following these simple steps, you can easily bypass it and ensure a smooth Windows experience.
Now let’s move on to the next section, discussing how to edit the registry to fix the DistributedCOM error.
5. Edit the Registry
If you’re ready to delve into the inner workings of your system, it’s time to explore how tweaking the registry can unveil a world of possibilities.
Editing the registry can be a powerful way to fix the DistributedCOM error in Windows. Here are three key steps to get you started:
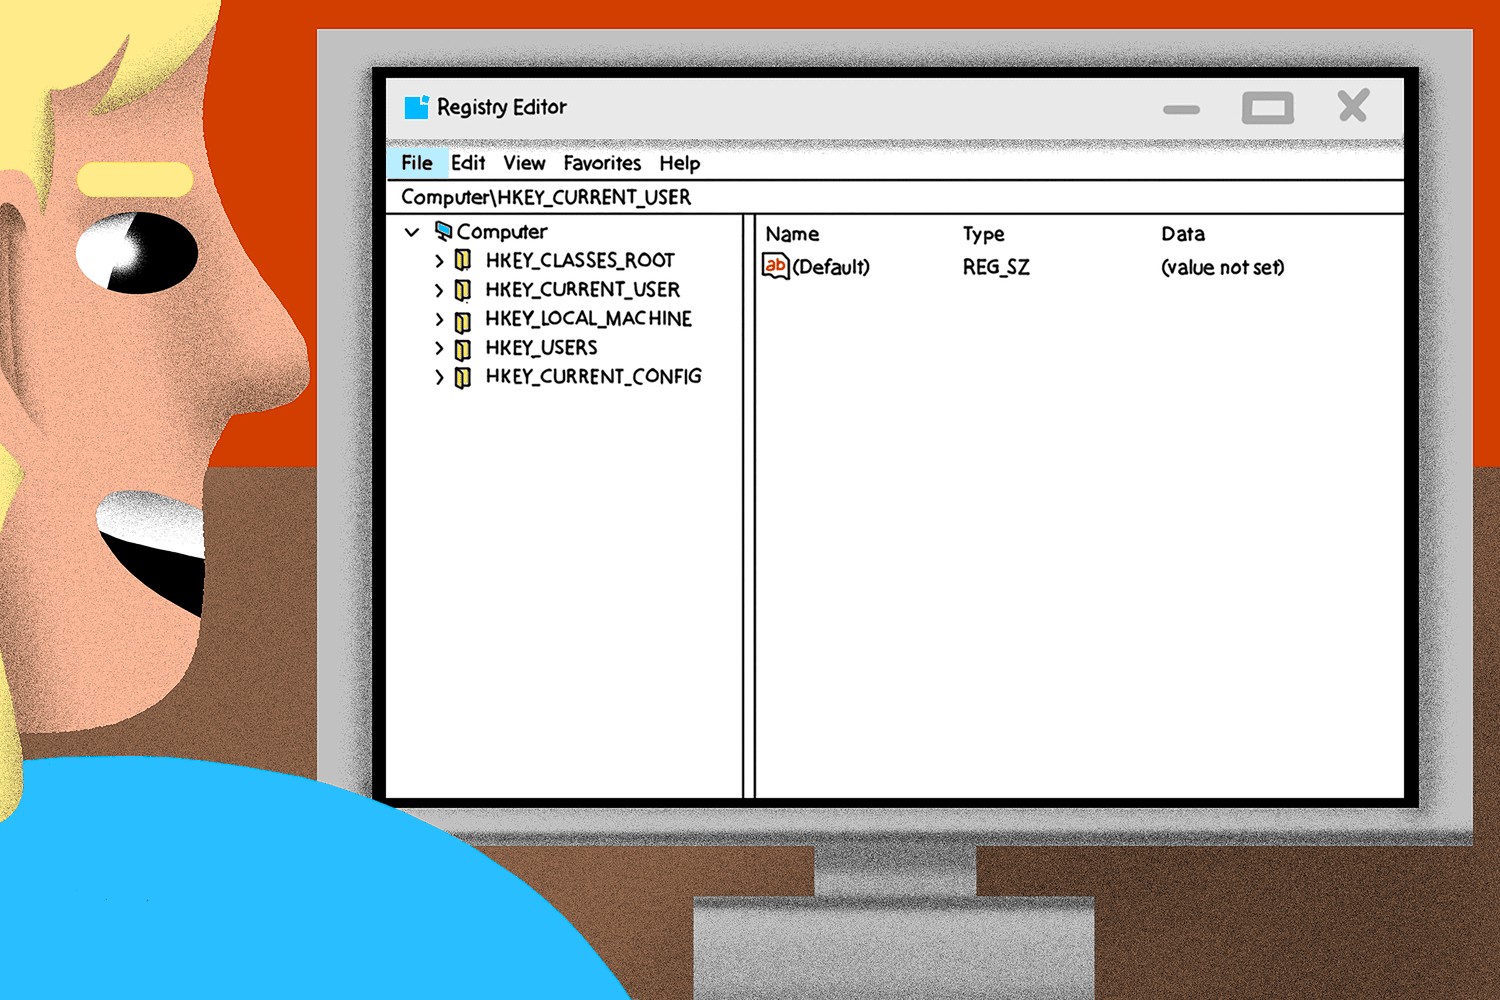
- Open the Registry Editor: Press the Windows key + R to open the Run dialog box, then type ‘regedit’ and hit Enter.
This will open the Registry Editor, where you can change the Windows registry.
- Locate the AppID: In the Registry Editor, navigate to HKEY_LOCAL_MACHINE\SOFTWARE\Classes\AppID.
Here, you will find a list of AppIDs associated with various applications. Look for the AppID that corresponds to the program causing the DistributedCOM error.
- Modify the Permissions: Right-click on the AppID and select ‘Permissions’.
In the Permissions dialog box, click ‘Advanced’ and ‘Change’ next to the Owner field. Enter your user account name and click ‘OK’.
In the Permissions dialog box, select your user account and check the box for ‘Full Control’.
Click ‘OK’ and close the Registry Editor.
By editing the registry, you can gain control over the AppID causing the DistributedCOM error and modify the necessary permissions. Once you have made the changes, you can verify the COM access permissions.
6. Verify Com Access Permissions
First, make sure that the COM access permissions are correctly verified. This is an essential step in fixing the DistributedCOM error in Windows. To do this, you must open the Component Services window by typing ‘coming’ in the Run dialogue box and pressing Enter.
Once the window opens, please navigate to Component Services > Computers > My Computer > DCOM Config. Here, you will find a list of applications and their corresponding permissions. Check if the application causing the error is listed and verify that the necessary approvals are enabled.
Next, check the permissions for the application. Right-click on the application causing the error and select Properties. In the Properties window, go to the Security tab. Under the Launch and Activation Permissions section, click on Edit. Ensure that the user accounts or groups have the required permissions, such as Local Activation, Remote Activation, and Launch. If any licenses are missing, click on Add to add them.
Once you have verified and set the appropriate permissions, click OK to save the changes.
With the COM access permissions adequately verified, you can now enable DCOM permissions for the error. This will ensure that the necessary approvals are granted to the DistributedCOM application. To do this, go back to the Component Services window and navigate to Component Services > Computers > My Computer > DCOM Config.
Right-click on the application causing the error and select Properties. In the Properties window, go to the Security tab. Under the Launch and Activation Permissions section, click on Edit. Enable the necessary permissions for the user accounts or groups. Once you have made the changes, click OK to save the settings.
By verifying the COM access permissions and enabling DCOM permissions, you can effectively fix the DistributedCOM error in Windows.
7. Enable Dcom Permissions for the Error
Now that you’ve verified the COM access permissions, it’s time to move on to the next step in fixing the DistributedCOM error on your Windows system. The current subtopic focuses on enabling DCOM permissions for the error.
This step is crucial as it allows the necessary permissions for DistributedCOM to function properly and resolve any issues causing the error.
To enable DCOM permissions, you need to access the Component Services window. You can do this by pressing the Windows key + R on your keyboard, typing ‘dcomcnfg’ in the Run dialog box, and hitting Enter.
Once the Component Services window opens, navigate to the ‘DCOM Config’ section. Here, you will find a list of applications and services. Look for the application or service related to the DistributedCOM error you’re experiencing.
Once you’ve located the application or service, right-click on it and select ‘Properties’ from the context menu. In the Properties window, go to the ‘Security’ tab. Here, you will find various options to configure the DCOM permissions.
Make sure that the necessary permissions, such as ‘Local Activation’ and ‘Local Launch,’ are enabled for the application or service. Once you’ve made the changes needed, click ‘Apply’ and then ‘OK’ to save the settings.
Enabling DCOM permissions can help resolve the DistributedCOM error and ensure smooth functioning of your Windows system.
By following these steps and enabling DCOM permissions for the error, you’re proactively fixing the DistributedCOM error on your Windows system. This step allows you to grant the necessary permissions to the application or service causing the error, ensuring it can function properly without any restrictions.
Enabling DCOM permissions is a crucial part of troubleshooting this error, and it can help resolve the issue and enhance the overall performance of your Windows system.
So, take the time to enable DCOM permissions and enjoy a smoother computing experience.
Frequently Asked Questions
1. Can a Distributedcom Error Cause Damage to My Computer?
Yes, a DistributedCOM error can potentially cause damage to your computer. These errors occur when the Distributed Component Object Model encounters a problem with the communication between different software components.
These errors can lead to system instability, application crashes, and even data loss if left unresolved. It’s important to address these errors promptly to prevent any further damage to your computer.
2. Can I Ignore a Distributedcom Error or is It Necessary to Fix It?
If you encounter a DistributedCOM error on your Windows computer, it’s not recommended to ignore it. While it may not directly cause damage to your computer, it can lead to various issues and hinder the performance of your system. It’s necessary to fix the error to ensure smooth functioning of your computer and prevent any potential problems.
Ignoring the error can result in further complications and potentially affect the stability and security of your system. Therefore, it’s advisable to take the necessary steps to fix the DistributedCOM error promptly and prevent any potential issues from arising.
3. Are Distributedcom Errors Specific to Certain Versions of Windows?
DistributedCOM errors can occur on various versions of Windows, including Windows 10, Windows 8, and Windows 7. These errors are not specific to certain versions of Windows, as they can occur due to various reasons. Some common causes include incorrect system configurations, faulty registry entries, or conflicts with other software.
It is important to address these errors regardless of your Windows version. Ignoring them can lead to system instability and hinder the smooth functioning of your computer.
To effectively resolve DistributedCOM errors, follow the 7 best ways to fix them on Windows. This will ensure a seamless user experience.
4. Can a Distributedcom Error Be Caused by a Specific Software or Program?
Yes, a DistributedCOM error can be caused by a specific software or program on your Windows computer. Sometimes, certain applications or software installations can conflict with the DistributedCOM component, resulting in error messages or system instability.
It is important to identify the specific software or program that is triggering the error and then take appropriate steps to fix the issue. This may involve updating the software, reinstalling it, or contacting the software’s developer for support.
By addressing the root cause, you can effectively resolve the DistributedCOM error and ensure a smooth functioning of your Windows system.
5. Are There Any Known Conflicts Between Distributedcom Errors and Specific Antivirus Software?
Are you wondering if there are any clashes between distributed com errors and specific antivirus software? It’s like trying to fit a square peg into a round hole.
Sometimes, specific antivirus programs can indeed conflict with distributed com errors. These conflicts can arise due to compatibility issues or conflicting settings.
So, if you’re facing a distributed com error and have antivirus software installed, it’s worth checking if there are any known conflicts between the two.
Conclusion
In conclusion, fixing the DistributedCOM error in Windows is crucial for the smooth functioning of your computer. By following the 7 best ways outlined in this article, you can effectively eliminate this error and improve your system’s performance.
However, it’s important to note that these methods may not guarantee a permanent solution, as the error can sometimes be caused by underlying issues that are more complex to resolve. Therefore, it’s advisable to regularly update your Windows operating system and take necessary precautions to prevent the error from occurring in the first place.
By staying proactive and vigilant, you can ensure a hassle-free computing experience. So, don’t let the DistributedCOM error hold you back. Take action today and enjoy a seamless and efficient Windows experience.