When you try to access a website or use internet-connected apps on your computer, you may sometimes see an error message saying the DNS server is not responding. This prevents you from being able to browse the web or use certain apps that require an internet connection.
DNS or Domain Name System is a key part of how your computer accesses websites by mapping domain names to their underlying IP addresses. A DNS server not responding error means this mapping process isn’t working properly.
Don’t worry though – in most cases, DNS errors are easy to fix with a few simple troubleshooting steps. In this comprehensive guide, we will cover:
- What is a DNS server and how it works
- What does the ‘DNS server not responding’ error mean
- Potential causes of DNS server errors
- 8 ways to fix DNS server not responding issues on both Mac and Windows PCs
What is a DNS Server?
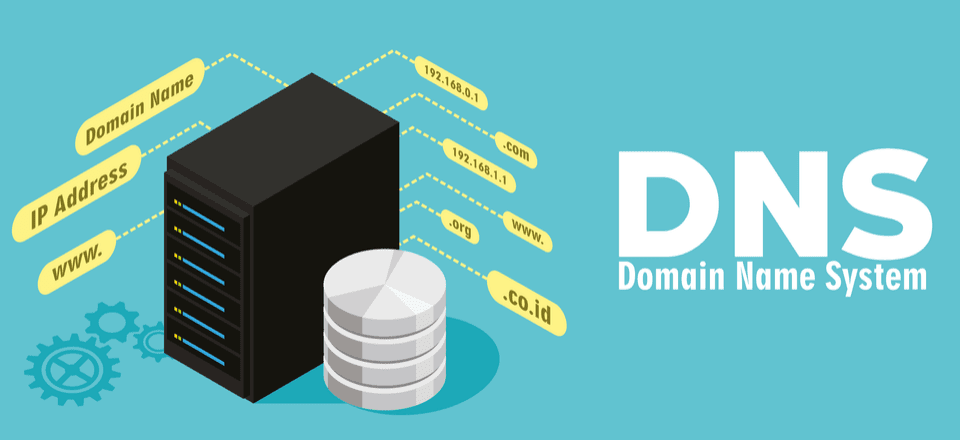
A DNS server is an internet server that translates human-readable domain names like ‘google.com’ into computer-readable IP addresses like ‘142.250.190.78’.
This conversion between domain name and IP address is essential for accessing websites and apps on both mobile and computer devices. DNS servers act like an address directory for the internet.
When you try to open a webpage or use an internet-connected app, a DNS lookup occurs in the background:
- Your browser or device queries a DNS server for the IP address of the domain name you are trying to access.
- The DNS server then responds with the correct IP address linked to that domain if available.
- Your device can then use this IP address to connect to the right server to load the website or app.
DNS servers may be provided by your internet service provider or third-parties like Google, OpenDNS, etc. Many devices have default DNS servers set automatically, but you can also configure preferred DNS servers manually.
What Does “DNS Server Not Responding” Mean?

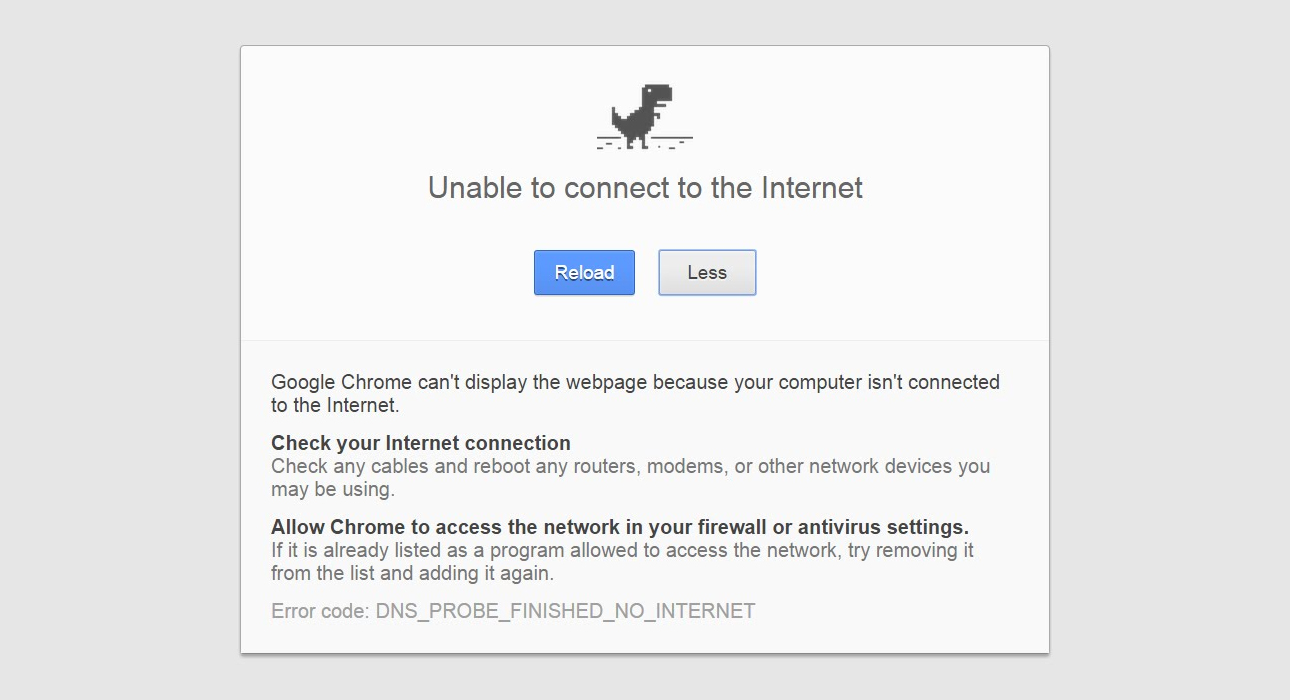
The “DNS server not responding” error message means that your computer or device cannot complete a DNS lookup for a website or internet-connected app.
There are a few reasons why you may encounter this error:
- Your primary DNS server may be down or unreachable.
- There may be connectivity issues between your device and the DNS server.
- Your internet connection itself may be down.
- There may be a firewall blocking DNS requests.
- The DNS cache may be corrupted.
If no DNS lookup can go through, you’ll get a DNS server not responding error when trying to open webpages or use internet-dependent apps.
Some signs you may have a DNS server problem:
- Webpages not loading or taking forever to load
- Web browsers displaying “Server not found” errors
- Apps saying “No internet connection” even though internet is working fine
- Inability to open any webpages or connect to internet
What Causes DNS Server Errors?
There are a few common culprits behind DNS errors:
DNS Server Outages – Your current DNS server may be down due to technical issues. Your ISP or third-party public DNS server could be experiencing downtime.
Connectivity Issues – Problems with your router, modem, or ISP can prevent connectivity between your device and the DNS server.
Network Problems – Incorrect network settings, firewalls, or software conflicts can block DNS requests from your computer to the DNS server.
Malware/Viruses – Malicious software can modify or block DNS settings on your PC.
Incorrect DNS Settings – Errors or outdated DNS server addresses configured manually can lead to DNS errors.
Corrupt DNS Cache – The DNS cache saving local hostname-to-IP address mappings may get corrupted or stale over time.
Computer Problems – Faulty network adapters, drivers, or protocols can interfere with DNS queries and cause them to fail.
ISP Problems – Issues with your ISP’s DNS servers or network can also manifest as a DNS server not responding error.
Now let’s look at the steps to fix the error and get your DNS lookup working again:
How to Fix DNS Server Errors on a Mac
Here are the methods to resolve a DNS server not responding problem on Mac:
1. Restart your Network Devices
Often a simple restart can fix DNS errors. Follow these steps:
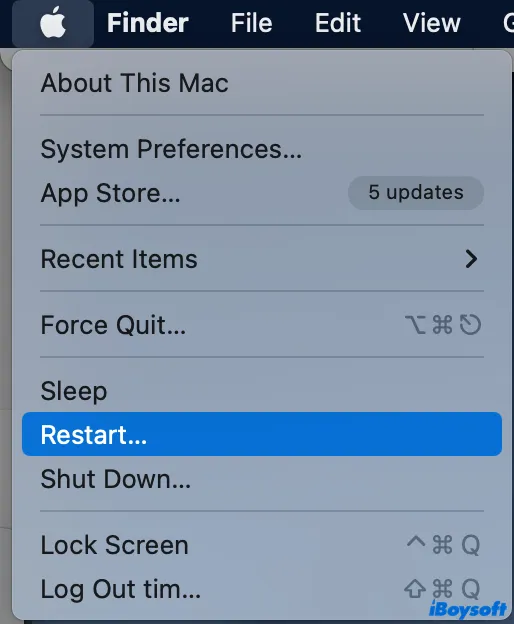
- First restart your modem and router by unplugging them from power, waiting 30 seconds, and plugging them back in.
- After they have restarted, also restart your computer.
- Once your Mac boots back up, try opening a website to see if DNS works.
Restarting will clear any corrupt DNS cache and refresh the connections.
2. Flush the DNS Cache on Mac
Flushing your DNS cache forces your computer to re-populate its DNS entries from the external server rather than using old cached lookups:
On macOS Big Sur or later:
- Click the Apple logo menu and go to System Preferences > Network.
- Click the Configure button for your connection type (Wi-Fi, Ethernet, etc).
- Go to the DNS tab.
- Click the minus sign under the DNS Servers listed.
- Click OK and Apply to save the change.
On earlier macOS versions:
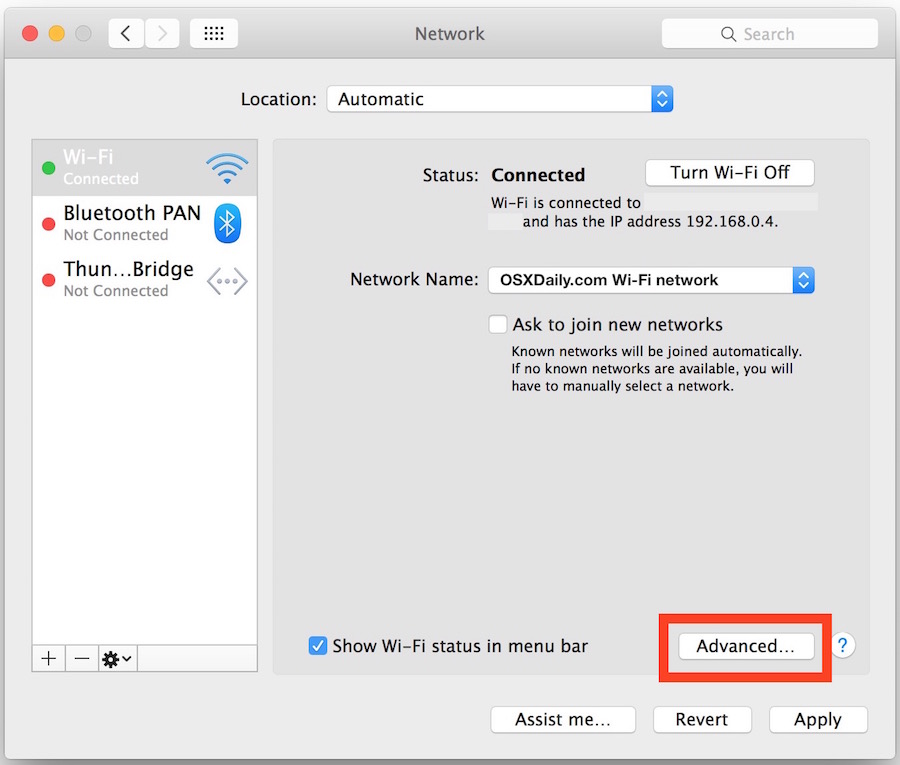
- Go to System Preferences > Network.
- Select your connection type listed in the sidebar and click Advanced > DNS.
- Click the minus sign icon to remove any DNS entries.
- Click OK to save the changes.
Your DNS cache is now flushed completely. Run a web search to confirm connectivity is restored.
3. Switch DNS Servers
Your ISP’s DNS servers or public third-party DNS servers like Google or Cloudflare may be encountering issues. Changing the DNS servers assigned to your Mac can help resolve this:
- Go to System Preferences > Network.
- Select your network connection and click Advanced > DNS.
- Click the plus icon to add new DNS server addresses.
- Enter public DNS servers like Google (8.8.8.8), Cloudflare (1.1.1.1), etc.
- Alternatively, use your ISP’s alternative DNS servers if available.
- Click OK and Apply to save the changes.
Now your Mac will use the new DNS servers for lookups which often fixes connection problems.
4. Disable IPv6
In certain cases, having IPv6 enabled can interfere with DNS queries. Temporarily disabling it may help:
- Go to System Preferences > Network.
- Select your network connection and click Configure.
- Go to TCP/IP tab.
- From Configure IPv6, select Off.
- Click OK and Apply to save this change.
Now check if websites are opening without any DNS errors. You can re-enable IPv6 later on if needed.
5. Update Network Adapter Drivers
Outdated or faulty drivers for your Mac’s network adapters can cause connectivity issues including DNS problems:
- Click the Apple logo and go to About This Mac > System Report.
- Select Network in the sidebar and identify your network adapters.
- Check the manufacturer’s website for the latest drivers available for download.
- Install the updated driver and restart your system.
With the latest drivers, your network hardware will function optimally and DNS queries will go through.
6. Run an Antivirus Scan
Malware and viruses can modify DNS settings or damage the TCP/IP stack causing DNS failure. Run a scan with your antivirus software to check for any infections:
- Install a trusted antivirus program like Bitdefender Antivirus for Mac.
- Update its virus definitions to the latest.
- Run a full system scan.
- Quarantine or remove any malware found.
- Reboot your Mac once the scan completes.
This will clean up any malicious programs that may be interfering with DNS functionality.
7. Try an Alternate Web Browser
As an application-level fix, try switching between web browsers to see if one of them has a configuration issue:
- If using Safari, switch to Firefox or Chrome.
- If using Chrome, try Safari or Firefox.
- Clear the browser cache before testing it.
- Visit a website to see if DNS works in the new browser.
If DNS works in the new browser, the original browser likely has a corrupted cache or incorrect settings that can be deleted to fix the problem.
8. Contact Your ISP
If you still face the DNS server not responding error after trying all of the above steps, contact your Internet Service Provider’s customer support:
- Explain the DNS error you are encountering.
- Provide examples of websites affected.
- Specify troubleshooting steps attempted so far.
- Request them to look into the issue.
Your ISP can check for problems with their DNS servers or network that may require fixing on their end to restore your internet connectivity.
This will help resolve service issues that may be causing your DNS failures.
How to Fix DNS Server Errors on Windows
On Windows PCs, similar steps can help fix the DNS server not responding problem:
1. Restart Your Network Devices and PC
Just like on Mac, restarting the modem, router, and computer can clear up temporary glitches:
- Unplug the power to your modem and wireless router. Wait 30 seconds before reconnecting.
- Restart your Windows PC once the modem and router boot back up.
- Try opening a website to check if DNS queries now work.
Restarting refreshes the connections and DNS server response.
2. Flush DNS
Flushing the DNS forces Windows to re-populate the DNS cache rather than use old entries:
- Open Command Prompt as admin.
- Type
ipconfig /flushdnsand hit Enter. - Close Command Prompt when done.
Now attempt accessing a website to verify DNS is functioning again.
3. Change DNS Servers
Switching your assigned DNS servers may resolve server-side issues:
- Go to Control Panel > Network and Internet > Network Connections.
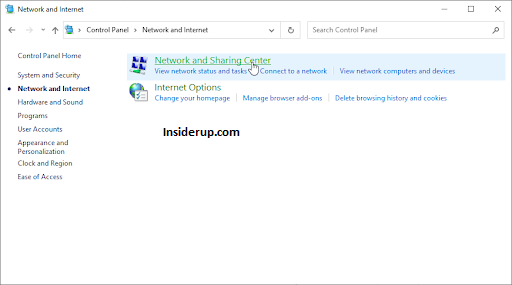
- Right-click your network adapter and select Properties.
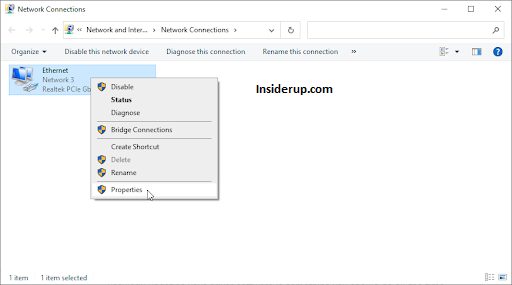
- Select Internet Protocol Version 4 (TCP/IPv4) and click Properties.
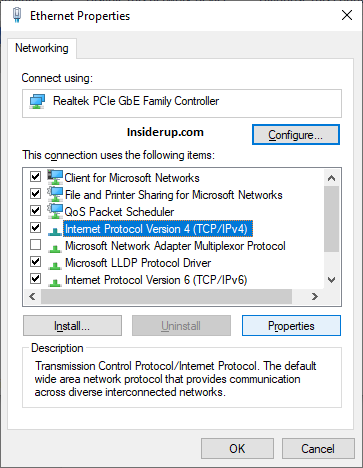
- Change the preferred and alternate DNS server addresses to public ones like Google or Cloudflare.

- Click OK to save changes and close windows.
Opening a webpage now utilizes the new DNS servers instead to avoid any problems on old servers.
4. Disable IPv6
Like on Mac, disabling IPv6 as a troubleshooting step can get DNS working again:
- Go to Network Connections and adaptor properties like above.
- Select Internet Protocol Version 6 (TCP/IPv6).
- Change settings to say Prefer IPv4 over IPv6.
- Click OK to save and close.
Check if disabling IPv6 helps resolve the connectivity problems temporarily.
5. Update Network Adapter Drivers
Having the latest network adapter drivers prevents hardware issues:
- Press Windows + R and type
devmgmt.mscto open Device Manager.

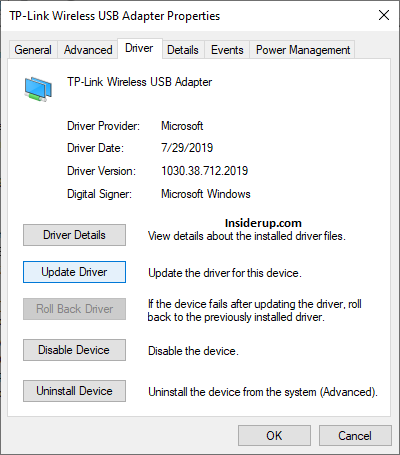
- Expand Network adapters to see your hardware.
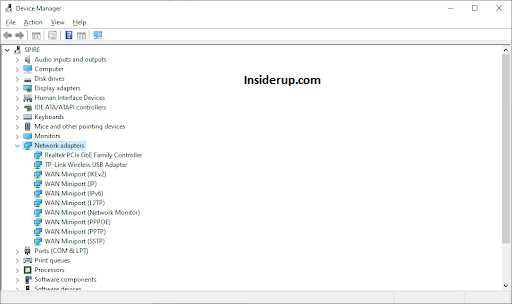
- Right-click each device and select Update driver.
- Search automatically online for updated driver software to install.
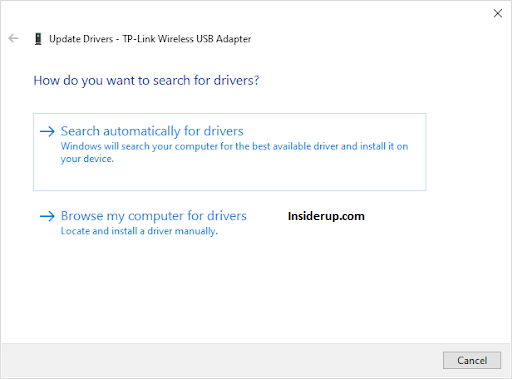
- Reboot once the drivers are updated.
With fresh drivers, your network cards can communicate properly with the DNS servers.
6. Run Antivirus Scan
Like on Mac, malware may be damaging network settings and connections:
- Install a recommended antivirus like Bitdefender Antivirus for Windows.
- Ensure its definitions are fully updated.
- Run a full system scan.
- Quarantine or remove detected malware.
- Reboot your PC once scanning completes.
Removing viruses can fix damaged TCP/IP settings that may cause DNS failures.
7. Try an Alternate Browser
On Windows, also test switching between web browsers:
- Open a different browser like Firefox or Chrome if issue occurs in one browser.
- Visit a website to see if DNS works there.
- If so, reset the original browser by clearing cache/cookies.
Try replicating the DNS error in multiple browsers to isolate the issue.
8. Call Your ISP
If you still face DNS issues, contact your Internet Service Provider:
- Inform them of the ongoing DNS error.
- Note troubleshooting steps attempted so far.
- Request them to investigate their DNS servers or network.
- Ask them to call back after checking at their end.
Your ISP can fix any problems with their infrastructure or services causing your DNS server to not respond.
Conclusion
DNS server not responding errors are often easy to fix with some simple restarts, DNS cache flushing, changing servers, and troubleshooting. In most cases, the problem is temporary and can be resolved in minutes.
But if you still face DNS lookup failures even after trying all the suggested steps above for your Mac or Windows PC, don’t hesitate to contact your ISP or a computer technician for assistance.
With a key role in accessing the internet, diagnose and resolving any DNS server issues quickly should always be a top priority for uninterrupted web browsing and connectivity.
What is the easiest first step to fix a DNS server not responding error? The easiest first step is to restart your network devices like the modem, router, and computer. A simple reboot can clear up temporary DNS errors and get your DNS server responding again.
Why does flushing your DNS cache help resolve DNS server issues? Flushing the DNS cache clears out any stale or incorrect DNS entries stored on your device. This forces your computer to re-populate its DNS cache with fresh lookups from the external DNS server, which often fixes connectivity issues.
When should you change your primary and secondary DNS server settings?
If restarting your network and flushing the DNS does not work, the next step is to change your DNS servers to public options like Google or Cloudflare DNS. Your ISP’s DNS servers may be having problems, so switching to reliable public servers generally resolves the issue.
How does disabling IPv6 help troubleshoot a DNS server not responding error? In some cases, having IPv6 enabled can interfere with DNS queries being able to reach the DNS server. Temporarily disabling IPv6 takes this out of the equation and allows DNS traffic to flow over IPv4 instead.
Why update your network adapter drivers to fix DNS errors? Outdated or faulty drivers for your network adapter can sometimes lead to connectivity issues that manifest as a DNS server not responding error. Updating to the latest driver from the manufacturer ensures peak performance.
When should you contact your Internet Service Provider about DNS errors? If you still experience DNS server not responding errors after trying all the basic troubleshooting steps like restarts, flushing DNS, changing servers, etc., then it’s a good idea to contact your ISP. There may be a more serious underlying problem that requires investigation or fixing on their infrastructure side.