
Have you ever felt like your computer is carrying the world’s weight on its shoulders? Like a backpack bursting at the seams, your backup disk in Windows 10 can become full and overloaded with backup files. It’s like trying to fit an elephant into a shoebox! But fear not, because this article will show you how to delete those backup files and free up some much-needed space.
Imagine this: you’re a chef working in a small, cramped kitchen. When you finish cooking a dish, you must find a place to store the leftovers. But as time passes, the fridge becomes packed with containers, making it impossible to find anything. You need to declutter and make room for new ingredients.
Also Read: Easy Solutions To Fix Chrome Scrolling Not Working
Similarly, your backup disk in Windows 10 is like that overcrowded fridge, causing your computer to slow down and struggle. Following the steps in this article, you can delete those unnecessary backup files and give your computer the breathing room to operate smoothly.
So, let’s get started and clear out that digital clutter!
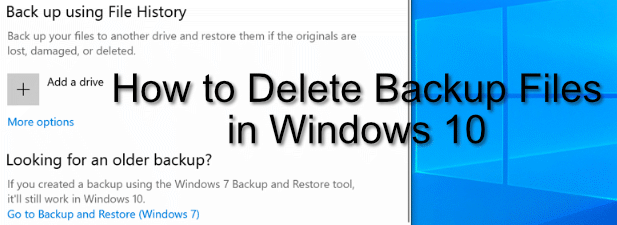
How to Delete Backup Files in Windows 10 When Backup Disk Full
You can easily free up space on your backup disk by deleting unnecessary backup files in Windows 10 when it’s full.
Start by opening the File History settings on your computer. To do this, go to the Start menu and type ‘File History’ in the search bar. Click on the ‘File History settings’ option that appears.
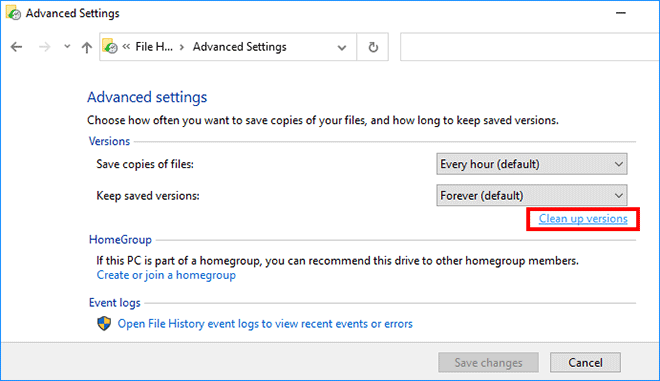
Once you’re in the File History settings, you’ll see an option to ‘Clean up versions.’ Click on this option to proceed.
In the ‘Clean up versions’ window, you’ll see a list of all the backup versions taking up space on your disk. These versions are organized by date, with the most recent ones at the top.
You can choose to delete all versions except the most recent one or select specific versions to delete. Simply check the box next to the versions you want to delete and click on the ‘Clean up’ button.
Deleting unnecessary backup files’ll free up valuable space on your backup disk, allowing you to continue backing up your important files without any issues.
Now that you know how to free up space on your backup disk, let’s move on to the next section to discuss how to delete backup files in Windows 10.
How to Delete Backup Files in Windows 10
To free up space on your computer, consider eliminating redundant copies of your important data. Here are a few steps to help you delete backup files in Windows 10:
- Open the Start menu and type ‘Control Panel’ in the search bar. Click on the Control Panel app to open it.
- In the Control Panel, click on the ‘System and Security’ option. Then, click on ‘File History.’
- You’ll see a list of all the backup files created on your computer. Select the files or folders that you want to delete.
- Once you’ve selected the files, click on the ‘Delete’ option at the top of the window. Confirm the deletion when prompted.
By following these steps, you can easily delete backup files in Windows 10 and free up valuable disk space.
Now, let’s move on to the next section about file history cleanup, where you can learn more about managing your backup files efficiently.
File History Cleanup
File History Cleanup helps you declutter and discard unnecessary duplicates, creating a clean and clutter-free computer.
When your backup disk is full, it’s essential to delete backup files that are no longer needed to free up space.
With File History Cleanup, you can quickly identify and remove redundant files, ensuring that your backup disk is optimized for future backups.
You can make room for new backups by eliminating unnecessary duplicates and protecting your files.
To perform a disk cleanup, you can use the built-in Windows utility called ‘Disk Cleanup.’ This tool frees up space on your backup disk by removing temporary files, system files, and other unnecessary items.
By running a disk cleanup, you can reclaim valuable disk space and improve the performance of your computer.
This step is crucial in managing your backup files and ensuring that your disk doesn’t get filled up again in the future.
By utilizing File History Cleanup and performing a disk cleanup, you can effectively manage your backup files in Windows 10.
Removing unnecessary duplicates and freeing up space on your backup disk allows you to continue backing up your important files without worrying about running out of storage.
With a clean and clutter-free computer, you can ensure the safety and accessibility of your data.
Perform a Disk Cleanup
Performing a disk cleanup is the key to reclaiming valuable space and optimizing your computer’s performance. Over time, your Windows 10 computer can accumulate many unnecessary files, such as temporary files, system files, and previous Windows installations. These files can take up a substantial amount of space on your backup disk, causing it to become full. You can easily delete these unnecessary files and free up space by performing a disk cleanup.
To perform disk cleanup in Windows 10, follow these simple steps:
- Press the Windows key on your keyboard and type “Disk Cleanup”in the search bar. Click on the “Disk Cleanup”app in the search results.
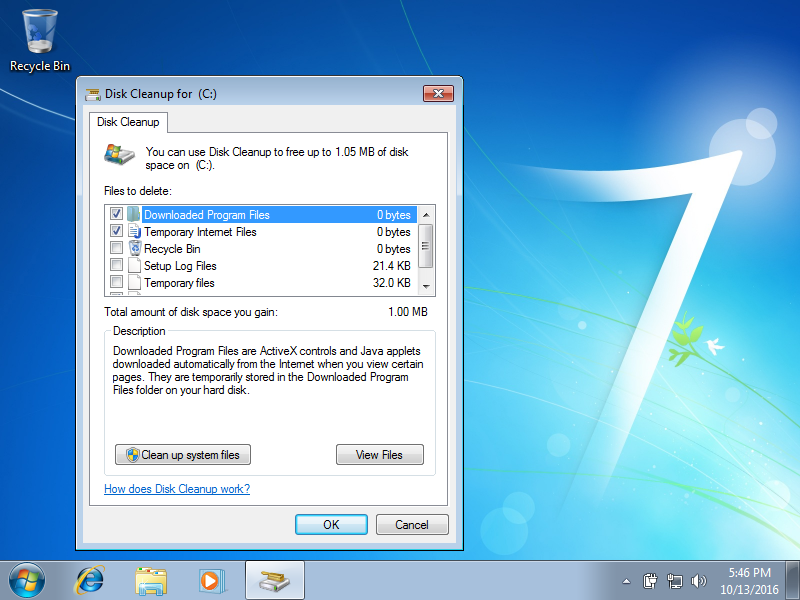
- In the Disk Cleanup window, you will see a list of files that can be deleted. These include temporary files, downloaded program files, and recycle bin files. Check the boxes next to the types of files you want to delete.
- Once you select the files you want to delete, click the “OK”button. Windows will then calculate how much space you can free up. Click on the “Delete Files”button to proceed with the cleanup.
Performing a disk cleanup is an effective way to free up space on your backup disk and ensure your Windows 10 computer runs smoothly. Once you have completed the disk cleanup, you can move on to the next step, enabling Storage Sense. This feature automatically frees up space by deleting unnecessary files, ensuring your backup disk remains clear and ready for new backups.
Enable Storage Sense
Enabling Storage Sense is like having a magical cleaning fairy that swoops in to effortlessly clear out all the unnecessary clutter on your computer, making it feel brand new again.
With just a few simple steps, you can easily enable Storage Sense and let it do all the hard work.
Here are three reasons why you should enable Storage Sense on your Windows 10 computer:
– It automatically deletes temporary files: Storage Sense can automatically remove temporary files that take up space on your computer. Applications often create these files and can quickly accumulate over time. By enabling Storage Sense, you won’t have to worry about manually deleting these files anymore.
– It cleans out your recycle bin: Deleting files on your computer often end up in the recycle bin. However, the recycle bin can take up much space if not regularly emptied. Storage Sense can automatically empty your recycle bin, freeing up valuable storage space on your computer.
– It manages your OneDrive files: If you use Microsoft’s cloud storage service, OneDrive, Storage Sense can help you manage your files. It can automatically move files that you haven’t accessed in a while to the cloud, freeing up space on your local storage. This feature is especially useful if you have limited storage on your computer.
By enabling Storage Sense and letting it take care of unnecessary clutter, you can make your computer feel like new again.
Now, let’s move on to the next step of the process: cleaning your downloads folder.
Clean Your Downloads Folder
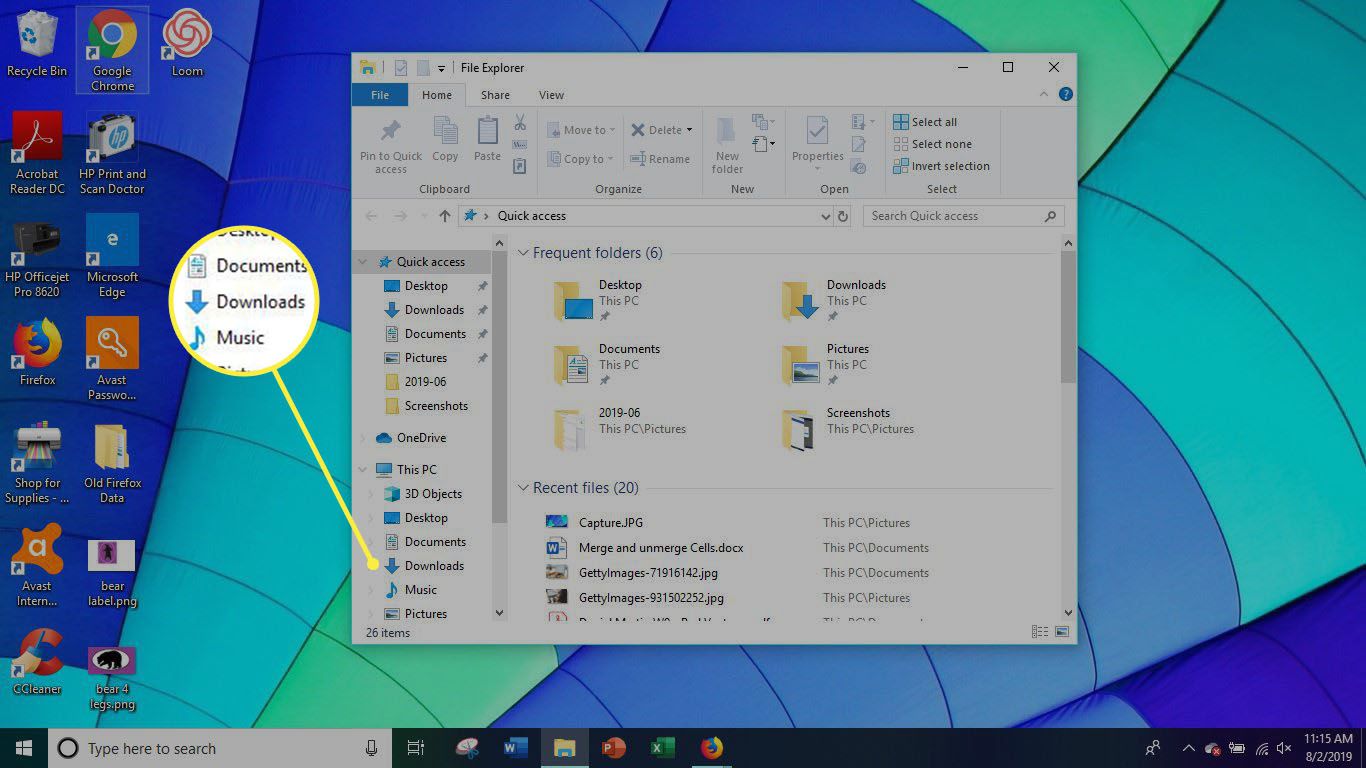
To declutter your computer and optimize its performance, you can easily clean out your downloads folder by simply sorting through the files and deciding which ones you no longer need, freeing up valuable storage space.
Over time, your downloads folder can become a repository for files you’ve already used or no longer require. By going through these files and deleting the ones you no longer need, you can make room for new downloads and ensure your computer runs smoothly. Once you’ve cleared out your downloads folder, you can move on to deleting system restore points.
Deleting unnecessary files from your downloads folder is a straightforward process. Start by opening your downloads folder and reviewing the files stored within. Look for files you have already used or no longer need, such as installation files for programs you’ve already installed. Simply select these files, press the delete key, or right-click and choose the delete option.
You can also sort the files by date and delete older ones you no longer require. Once you’ve finished cleaning out your downloads folder, you can create more space for important files and improve your computer’s overall performance.
Cleaning out your downloads folder allows you to free up valuable storage space on your computer and optimize its performance. Once you’ve completed this step, you can delete system restore points. This will help you reclaim storage space and ensure your backup disk is manageable.
With a decluttered downloads folder and deleted system restore points, you can effectively manage your computer’s storage and maintain its efficiency.
Delete System Restore Points
Once you’ve cleared out your downloads folder, it’s time to eliminate excess baggage by removing unnecessary system restore points. These restore points are created by Windows 10 to help you revert your system to a previous working state in case of any issues. While they can be useful, they also occupy valuable space on your backup disk. To delete system restore points, follow these simple steps:
| Step | Action |
| 1 | Open the Control Panel by typing “Control Panel” in the Windows search bar and selecting the corresponding result. |
| 2 | Click on “System and Security” and then select “System”. |
| 3 | Click “System Protection” in the left sidebar in the System window. |
Once you’re in the System Protection window, you’ll see a list of drives with system protection enabled. Select the backup disk on which you want to free up space and click on the “Configure”button. In the next window, click on the “Delete”button to remove all restore points for that specific drive. Keep in mind that deleting all restore points means you won’t be able to revert your system back to any previous state. However, this shouldn’t be a concern if you have regular backups.
Deleting unnecessary system restore points is essential in freeing up space on your backup disk. Removing these restore points allows you to make room for new backups and ensure that your disk doesn’t fill up quickly, causing backup failures. With your downloads folder cleaned and system restore points deleted, you’re ready to understand why it’s important to delete backup files regularly. This will help you maintain an organized and efficient backup system without clutter.
Why Delete Backup Files?
Ready to free up some space on your backup disk? Let’s find out why regularly deleting backup files is crucial for an organized and efficient backup system.
When your backup disk becomes full, it can no longer accommodate new backup files, putting your data at risk. Deleting old backup files is necessary to ensure your backup disk has enough space to store the latest and most relevant data. By regularly deleting backup files, you can maintain an efficient backup system that allows you to quickly restore important files whenever needed.
Not only does deleting backup files free up space on your backup disk, but it also helps you avoid clutter and confusion. As time goes by, the number of backup files can accumulate, making it difficult to locate and restore specific files when necessary. By periodically deleting old backup files, you can keep your backup system organized and ensure that you can easily find the files you need. Additionally, deleting unnecessary backup files reduces the risk of mistakenly restoring outdated or irrelevant data.
Now that you understand the importance of regularly deleting backup files, let’s explore an alternative solution to freeing up space on your backup disk. Instead of manually deleting individual backup files, you can use a backup software that automatically manages and deletes old backups. This alternative solution can save you time and effort, as it takes care of the deletion process for you. By implementing this solution, you can ensure that your backup system remains organized and efficient without manual intervention.
Alternative Solution
If you’re tired of manually managing your backups, a nifty alternative solution takes care of the deletion process for you. Windows 10 has a built-in feature called ‘File History’ that automatically backs up your files and folders to an external drive. It keeps track of changes to your files and creates versions of them over time. When your backup disk becomes full, File History automatically deletes the oldest versions of your files to make room for new ones.
This way, you don’t have to worry about manually deleting backup files to free up space. Follow these simple steps to enable File History and use it as an alternative solution to manage your backups. First, connect an external drive to your computer. It can be a USB drive or a network drive.
Then, go to the ‘Settings’ menu and click on ‘Update & Security.’ From there, select ‘Backup’ and click on ‘Add a drive.’ Choose the external drive you connected earlier, and Windows 10 will start backing up your files to that drive automatically.
Whenever your backup disk becomes full, File History will automatically delete older versions of your files, ensuring you always have the most recent backups without manually deleting anything.
File History is a convenient alternative solution for managing backups in Windows 10. It saves you time and effort by automatically deleting older versions of files when your backup disk is full. This feature ensures that your most recent files are always backed up without manual deletion. Give it a try and enjoy peace of mind with automated backup management.
Frequently Asked Questions
1. Can I Delete Individual Backup Files Instead of Deleting All of Them at Once?
Yes, you can delete individual backup files instead of deleting all of them at once. This allows you to selectively remove specific backups that are taking up too much space on your backup disk.
To do this, you can manually navigate to where the backup files are stored on your Windows 10 computer. From there, you can identify and delete the specific backup files that you no longer need.
By deleting individual backup files, you can free up valuable disk space while retaining other important backups you may want to keep.
2. How Do I Check the Amount of Free Space Left on My Backup Disk?
To check the amount of free space left on your backup disk, you can easily find out how much room you have left for all your important files and data. Head to the ‘This PC’ or ‘My Computer’ section on your desktop. Right-click on your backup disk and select ‘Properties’.
There, you’ll see the amount of free space available on your disk, allowing you to manage your backups efficiently.
3. Is It Possible to Automate the Deletion of Backup Files on Windows 10?
Yes, it’s possible to automate the deletion of backup files on Windows 10. By setting up a scheduled task, you can create a script or use third-party software to automatically delete the older backup files when the backup disk becomes full.
This way, you don’t have to manually delete the files whenever the disk is full, saving you time and effort. Automating the process ensures that your backup disk has enough space for new backups without constant monitoring.
4. Are There Any Risks Associated With Deleting Backup Files?
When it comes to deleting backup files, there are a few risks you should be aware of. You might lose important data you thought you no longer needed, but later realize you do. It’s like a game of Jenga, where one wrong move could cause the whole tower to crash.
Deleting backup files without caution is like removing a crucial block, leaving your data vulnerable and unsupported. Just imagine standing on the edge of a cliff, unsure of the ground beneath you.
So, it’s crucial to carefully consider the importance and necessity of each backup file before hitting that delete button.
5. Can I Recover Deleted Backup Files in Case I Delete Something by Mistake?
Yes, you can recover deleted backup files in case you delete something by mistake. Windows 10 has a built-in feature called ‘File History’ that allows you to restore previous versions of files or folders.
To recover deleted backup files, open the File History settings, select the folder where the deleted files were stored, and click on the ‘Restore’ button. This will bring back the deleted files to their original location.
It’s important to note that the success of file recovery depends on how frequently you’ve set up the File History to back up your files and how long you’ve been using it.
Conclusion
In conclusion, when managing backup files in Windows 10, it’s essential to take charge and clear the clutter. Like tidying up a messy room, deleting backup files is like creating breathing space for your computer’s storage.
By utilizing the File History Cleanup, Disk Cleanup, Storage Sense, and other methods mentioned in this article, you can declutter your backup disk and ensure the smooth functioning of your Windows 10 system.
Think of it as a refreshing spring cleaning for your computer, where you sweep away the excess and make room for new possibilities. By deleting unnecessary backup files, you’re freeing up storage space and enhancing your device’s overall performance. It’s like giving your computer fresh air, allowing it to operate more efficiently and smoothly.
So, don’t let a full backup disk hold you back. Take control of your Windows 10 system, delete those backup files, and create a clean slate for your computer to thrive and excel. Embrace the feeling of liberation that comes with decluttering, and let your computer shine with its newfound freedom.
Remember, a tidy computer is a happy computer!