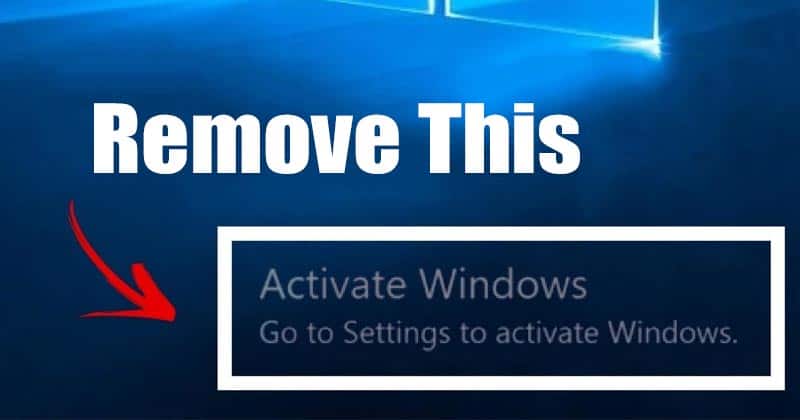
Are you tired of seeing that pesky ‘Activate Windows’ watermark on your desktop? It can be frustrating and distracting, especially if you use your computer for work or personal use.
But don’t worry, there are several fixes available to help you remove the Activate Windows 10 watermark permanently.
Imagine this scenario: you’re in the middle of an important presentation, and suddenly, that annoying watermark pops up, reminding you that your Windows is not activated. It can be embarrassing and unprofessional. That’s why finding a solution to remove it once and for all is crucial.
Also Read: How To Delete Backup Files In Windows 10 When Backup Disk Full
In this article, we will explore different methods and fixes that you can use to get rid of the Activate Windows watermark from your desktop. Whether it’s purchasing the product key, using a universal watermark disabler, disabling Windows tips, or using a command prompt, we’ve got you covered.
Say goodbye to the Activate Windows watermark and enjoy a seamless computing experience.
Fixes to Remove Activate Windows 10 Watermark Permanently
If you’re tired of seeing that pesky ‘Activate Windows 10’ watermark constantly popping up on your screen, we’ve got some fixes to make it disappear.
One of the easiest and most effective ways to remove the watermark is by activating your Windows 10. Simply go to the Settings menu, click on the ‘Update & Security’ option, and then select ‘Activation.’ From there, you can enter your product key or purchase a new one to activate your Windows 10. Once activated, the watermark will vanish, giving you a clean, hassle-free desktop experience.
Another method to remove the ‘Activate Windows’ watermark is by using a third-party software called RemoveWatermark. This software is designed to eliminate the watermark without activating your Windows 10. Simply download and install the RemoveWatermark software, run it on your computer, and follow the on-screen instructions. It will automatically detect and remove the watermark, leaving your desktop free from any distractions. However, remember that using third-party software may come with some risks, so it’s important to download from a trusted source and use it at your discretion.
If you’re uncomfortable with the above methods or want a more permanent solution, consider purchasing a genuine Windows 10 license. By buying a legitimate product key from Microsoft or an authorized retailer, you can activate your Windows 10 legally and remove the watermark permanently. This ensures that you have a fully licensed and supported operating system and eliminates any potential security risks associated with unauthorized software. So if you’re ready to say goodbye to the ‘Activate Windows’ watermark once and for all, investing in a genuine license is the way to go.
By following these fixes, you can eliminate the annoying ‘Activate Windows 10’ watermark on your screen. Whether you activate your Windows, use third-party software, or purchase a genuine license, the choice is yours. Remember to take the necessary precautions when downloading software from the internet and always ensure you use legal and authorized methods.
With these solutions, you can enjoy a watermark-free desktop experience and focus on what truly matters on your Windows 10 device.
The “activate Windows” Watermark
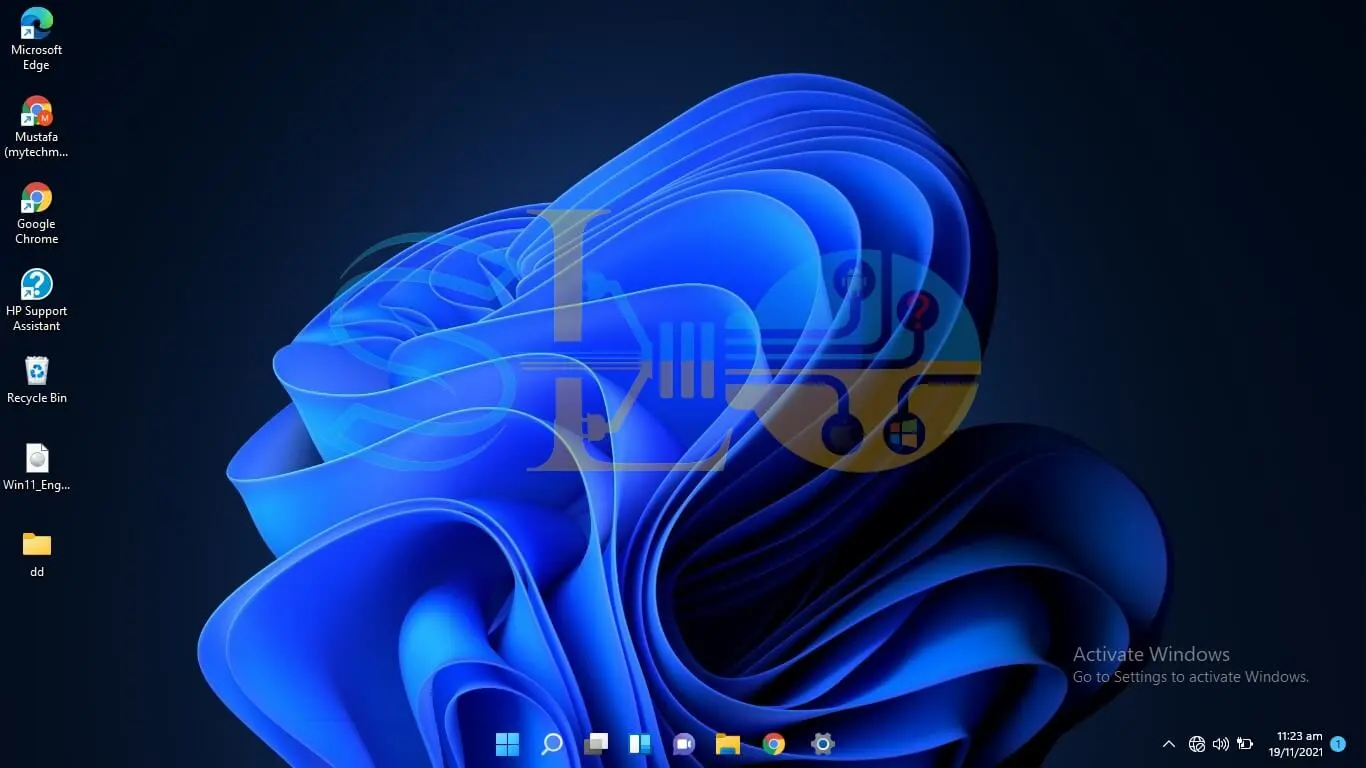
Unleash the full potential of your operating system by bidding farewell to that persistent reminder of untapped possibilities. The ‘Activate Windows’ watermark can be a constant annoyance, reminding you that your version of Windows is not fully activated. It appears in the bottom right corner of your screen, obstructing your view and detracting from the overall user experience. But fear not, there are ways to remove this watermark permanently and enjoy a seamless computing experience.
So, why do you get the ‘Activate Windows’ watermark in the first place? The most common reason is that you’re using an unactivated version of Windows 10. This could be because you haven’t entered a valid product key or your previous activation has expired. Microsoft includes this watermark as a gentle reminder to activate your copy of Windows and ensure you’re using a genuine version of their operating system. It serves as a prompt to purchase a product key or enter one if you already have one.
Now that you understand why the ‘Activate Windows’ watermark appears, it’s time to explore the fixes that can remove it permanently. Following the proper activation process, you can get rid of this watermark and enjoy all the features and benefits of a fully activated Windows 10. So, let’s delve into the steps required to activate your Windows and bid farewell to the persistent watermark.
Why Do You Get Activate Windows Watermark?
Get ready to discover why you see that annoying ‘Activate Windows’ watermark on your screen. Here are four reasons why you might be experiencing this frustration:
- You haven’t activated your copy of Windows: The most obvious reason for the watermark is that you haven’t activated your Windows operating system. When you install Windows 10, it comes with a trial period, and if you don’t activate it within that time, the watermark appears as a reminder.
- Your activation key has expired: If you’ve previously activated your copy of Windows, but the watermark suddenly appeared, it could be because your activation key has expired. Some keys have a limited validity period; if you’re using one, you’ll need to obtain a new key to remove the watermark permanently.
- Your activation key is not genuine: If you got it from an unauthorized source or it’s a counterfeit, Windows may detect it as invalid. In this case, the watermark will persist until you purchase a genuine product key.
- There was a hardware change: Windows uses a hardware-based activation method, and if you’ve made significant changes to your computer’s hardware, such as replacing the motherboard, Windows might not recognize your system as the same one it was originally activated on. As a result, the watermark will appear until you reactivate Windows.
Now that you understand why you’re seeing the ‘Activate Windows’ watermark, it’s time to consider purchasing the product key to remove it permanently.
Purchasing The Product Key

To get rid of the frustrating reminder on your screen, you only need to purchase the product key for Windows. The activate Windows watermark appears when your operating system isn’t activated, which means you’re using an unlicensed version of Windows.
You can activate your Windows 10 and permanently remove the annoying watermark by purchasing the product key.
You’ll receive a unique code to activate your Windows 10 when you purchase the product key. This code is usually provided by Microsoft or authorized resellers.
Once you have the product key, you can easily activate your Windows by going to the Settings menu, selecting the Update & Security option, and then clicking on the Activation tab. You can enter the product key and activate your Windows 10 from there.
By purchasing the product key and activating your Windows 10, you’ll not only remove the activate Windows watermark from your desktop but also gain access to all the features and updates provided by Microsoft.
Having an activated version of Windows ensures you receive security patches, bug fixes, and new features to enhance your computing experience. So, don’t let the watermark bother you any longer, take the necessary steps to activate your Windows 10 and enjoy a seamless operating system experience.
Removing Activate Windows 10 Watermark From Your Desktop
You can wipe away the lingering shadow on your desktop by finding the key to unlock the hidden potential of your Windows 10 operating system. The ‘activate windows’ watermark can be quite bothersome, but fortunately, there are ways to remove it without purchasing the product key.
One way to do this is by using a software called KMSpico, which activates your Windows 10 system without the need for a key. By following the instructions provided with the software, you can easily remove the watermark and enjoy a clean desktop.
Another method to permanently remove the ‘activate windows’ watermark without purchasing the product key is using a script called ‘Win10actPlus.’ This script allows you to activate your Windows 10 system using a digital license, which eliminates the need to buy a key. With just a few clicks, you can run the script and say goodbye to the watermark on your desktop.
Now that you know how to remove the ‘activate windows’ watermark using alternative methods, you can finally enjoy a watermark-free desktop. Taking advantage of these solutions allows you to unlock the full potential of your Windows 10 operating system without spending any additional money. Say goodbye to the watermark and continue using your computer without any distractions.
Remove “Activate Windows” Watermark Permanently Without Purchasing the Product Key.
Say goodbye to that annoying reminder on your desktop by unlocking the hidden potential of your Windows 10 operating system. You can permanently remove the “Activate Windows”watermark without purchasing the product key. You can enjoy a watermark-free desktop experience by following a few simple steps. Let’s take a look at the table below, which outlines the process:
| Steps | Description |
| Step 1 | Open the Command Prompt as an administrator. |
| Step 2 | Type in the command “slmgr -rearm” and press Enter. |
| Step 3 | Restart your computer. |
| Step 4 | Open the Command Prompt again and enter “slmgr -xpr” to check the activation status. |
| Step 5 | Voila! The watermark should now be gone permanently. |
With these easy steps, you can remove the “Activate Windows”watermark and enjoy an uninterrupted desktop experience. But if you want to explore another method, you can also remove the watermark using the registry editor. This method involves editing the Windows registry, so follow the instructions carefully.
Remove Activate Windows Watermark Using the Registry Editor
Now that you know how to remove the ‘Activate Windows’ watermark without purchasing the product key, let’s explore another method: using the Registry Editor. This method is a bit more advanced but can be very effective in permanently removing the watermark.
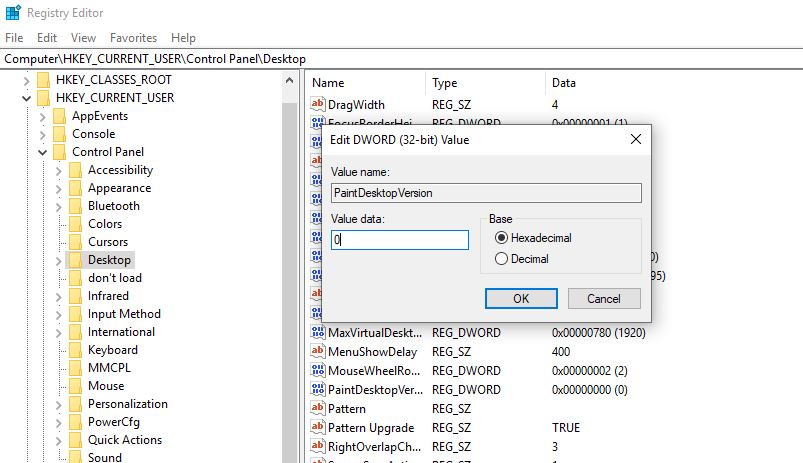
First, open the Registry Editor by pressing the Windows key + R, typing ‘regedit’ in the Run dialog box, and hitting Enter. Once the Registry Editor is open, navigate to the following path: HKEY_LOCAL_MACHINE\SOFTWARE\Microsoft\Windows NT\CurrentVersion\SoftwareProtectionPlatform.
Next, find the DWORD value named ‘Manual’ in the right-hand pane and double-click on it. Change the value data from 0 to 1, and then click OK. This will disable the manual activation feature and remove the watermark.
To ensure that the changes take effect, restart your computer. Once you’ve done that, the ‘Activate Windows’ watermark should be gone permanently.
In the next section, we’ll explore yet another method to remove the watermark using the Windows PowerShell. It’s a straightforward process that can also provide a permanent solution.
Remove Activate Windows Watermark With the Windows Powershell
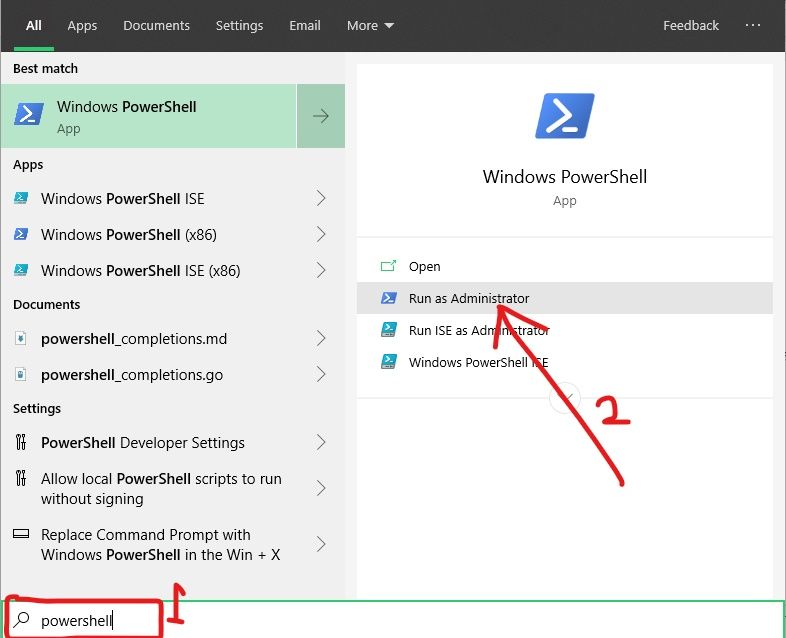
Once you’ve mastered the previous methods, it’s time to delve into the Windows PowerShell approach, which provides a seamless way to bid farewell to that persistent reminder on your screen. With Windows PowerShell, you can easily remove the Activate Windows watermark without hassle. Open the Start menu, search for PowerShell, and launch it as an administrator.
Once the PowerShell window is open, you can proceed to the next step and enter a few commands to remove the watermark permanently.
In the PowerShell window, type ‘slmgr /upk’ and hit Enter. This command uninstalls the existing product key from your system.
After that, type ‘slmgr /cpky’ and press Enter. This command clears the product key from the registry to ensure a clean removal.
Finally, type ‘slmgr /rearm’ and hit Enter. This command resets the licensing status of your system.
Once you’ve completed these steps, restart your computer, and the Activate Windows watermark should be gone for good.
Now that you’ve successfully removed the Activate Windows watermark using the Windows PowerShell, it’s time to explore another method to remove it permanently.
In the next section, we’ll discuss how to write a notepad script to remove the activate Windows 10 watermark permanently.
Write a Notepad Script to Remove Activate Windows 10 Watermark Permanently
To permanently eliminate the persistent reminder on your screen, you can create a notepad script that will effectively erase the Activate Windows 10 watermark from your desktop. Following these simple steps, you can easily remove the watermark and enjoy an uninterrupted viewing experience.
Here’s how you can do it:
- Open Notepad on your computer by searching for it in the Start menu.
- In the new Notepad document, paste the following script:
“`
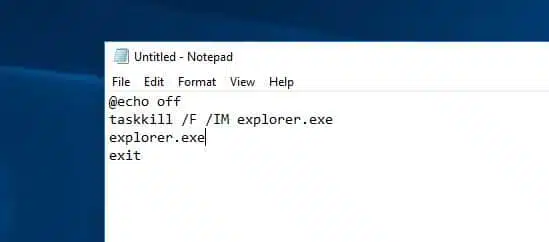
@echo off
taskkill /F /IM explorer.exe
explorer.exe
exit
“`
- Save the file with a ‘.bat’ extension, for example, ‘remove_watermark.bat’.
- Double-click on the newly created batch file to run it. This will temporarily stop the explorer.exe process and restart it, effectively removing the Activate Windows 10 watermark from your screen.
By creating and running this simple notepad script, you can easily eliminate the Activate Windows 10 watermark.
Now, let’s move on to another method to remove the watermark using ease of access settings.
Use the Ease of Access Settings to Remove the Activate Windows Watermark
You can easily get rid of the annoying Activate Windows watermark using the ease of access settings. This method doesn’t require third-party software and can be done directly through the Windows settings.
To begin, open the Start menu and click on the Settings icon. Select the ‘Ease of Access’ option from there and navigate to the ‘Display’ tab. You’ll find an option to enable the ‘Show notifications for’ setting here. Simply toggle this off, and the Activate Windows watermark will no longer appear on your screen.
You can permanently remove the Activate Windows watermark with the ease of access settings. This method is simple and effective, allowing you to enjoy a clean desktop without any distractions. By disabling the notifications for this specific feature, you can say goodbye to the watermark once and for all.
Now, let’s move on to the next section where we’ll explore another method to remove the Activate Windows watermark with the universal watermark disabler.
Remove the Activate Windows Watermark With the Universal Watermark Disabler
Ready to say goodbye to that annoying Activate Windows watermark on your screen? Let me show you how the Universal Watermark Disabler can effortlessly remove it for good! This simple-to-use tool is designed to eliminate the Activate Windows watermark from your desktop background, giving you a clean and professional look. With just a few clicks, you can say goodbye to that pesky watermark and enjoy an uninterrupted Windows experience.
To remove the Activate Windows watermark using the Universal Watermark Disabler, you only need to download and install the software from a trusted source. Once installed, open the program and click on the ‘Remove Watermark’ button. The tool will automatically detect the presence of the watermark and remove it from your screen. It’s as easy as that!
Now that you’ve successfully removed the Activate Windows watermark, it’s time to take it a step further and disable the Windows tips, tricks, and suggestions. This will enhance your user experience and prevent any future annoyances from popping up on your screen. By disabling these features, you can fully enjoy your Windows 10 without any distractions.
Let’s dive into the next section to learn how to disable these tips and tricks and bid farewell to the Activate Windows watermark.
Disable the Windows Tips, Tricks, and Suggestions to Remove Activate Windows 10 Watermark
By bidding adieu to the intrusive Windows tips, tricks, and suggestions, you can liberate your Windows 10 experience from the clutches of that persistent mark, allowing your screen to radiate with unblemished brilliance. These tips and tricks that pop up on your screen can be helpful at times, but they can also be quite annoying, especially when you’re trying to focus on your work or enjoy some leisure time. Disabling these tips and tricks removes the distraction and helps remove the activate Windows 10 watermark permanently.
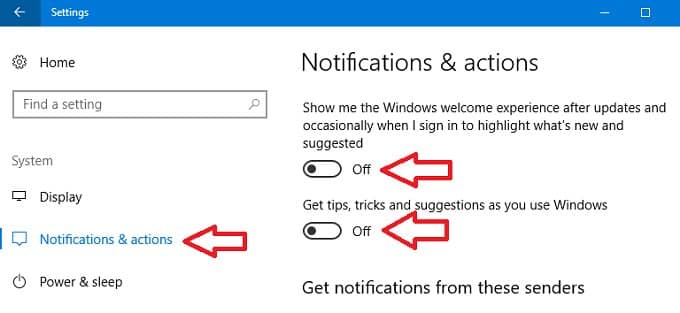
To disable the Windows tips, tricks, and suggestions, you can follow a few simple steps. First, open the Settings app by pressing the Windows key and clicking on the gear icon. In the Settings window, click on the System option. On the left-hand side menu, select the Notifications & actions tab. Scroll down until you find the section labeled “Get tips, tricks, and suggestions as you use Windows”. Simply toggle off the switch next to this option, and voila! Your Windows 10 experience will be free from the interference of these intrusive pop-ups.
To better understand the steps, refer to the table below:
| Step | Action |
| Step 1 | Press the Windows key and click on the gear icon to open the Settings app. |
| Step 2 | Click on the System option. |
| Step 3 | Select the Notifications & actions tab from the left-hand side menu. |
| Step 4 | Scroll down and toggle off the switch next to “Get tips, tricks, and suggestions as you use Windows”. |
With the Windows tips, tricks, and suggestions disabled, you’re one step closer to removing the activate Windows 10 watermark permanently. Now, let’s move on to the next section where we’ll explore how to remove the watermark using the command prompt.
Remove Activate Windows Watermark Using Command Prompt
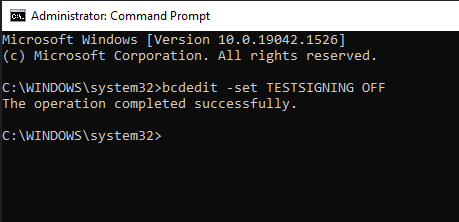
Once the Windows Tips and Tricks have been disabled, you can use the command prompt to efficiently remove the persistent mark that disrupts the seamless brilliance of your Windows 10 experience. The command prompt lets you execute various commands and perform system tasks easily.
To remove the activate Windows watermark, open the command prompt as an administrator by right-clicking on the Start button and selecting ‘Command Prompt (Admin).’ Once the command prompt is open, type the command ‘slmgr /rearm’ and hit Enter. This command will reset the licensing status of your Windows and remove the watermark.
After executing the command, you must restart your computer for the changes to take effect. Once your computer restarts, you will notice that the activate Windows watermark has disappeared, giving your desktop a clean and professional look. However, it’s important to note that this method only removes the watermark temporarily, and it will reappear after a certain period. To permanently remove the watermark, continue reading about killing the watermark process with a short notepad script.
Moving on to the next section about killing the watermark process with a short notepad script, you can achieve a more long-lasting solution to remove the activate Windows watermark. By using a simple script in Notepad, you can stop the process responsible for displaying the watermark. Open Notepad and type the following lines:
@echo off
taskkill /F /IM explorer.exe
explorer.exe
exit
Save the file with a ‘.bat’ extension, for example, ‘remove_watermark.bat’. Choose ‘All Files’ in the ‘Save as type’ dropdown menu. Next, right-click on the saved file and select ‘Run as administrator.’ This will execute the script and kill the watermark process. After a few seconds, the process will restart automatically, but the watermark will be gone. This method lets you enjoy your Windows 10 experience without distractions from the activate Windows watermark.
Killing the Watermark Process With a Short Notepad Script
To achieve a more long-lasting solution, you can use a script in Notepad to kill the process responsible for displaying the activate Windows watermark. This method involves creating a short script that stops the ‘slui.exe’ process, which is responsible for managing Windows activation. You can effectively remove the watermark from your screen by terminating this process.
First, open Notepad on your Windows 10 computer and start a new document. In the blank document, you need to insert the following lines of code:
“`batch
@echo off
taskkill /F /IM slui.exe
“`
Once you have entered these lines, save the file with a ‘.bat’ extension. For example, you can save it as ‘remove_watermark.bat’. Make sure to choose a location where you can easily find the file later.
After saving the file, locate it and right-click on it. From the context menu, select ‘Run as administrator’. This will execute the script with administrative privileges, allowing it to terminate the ‘slui.exe’ process and remove the activate Windows watermark from your screen.
Using a simple script in Notepad to kill the process responsible for displaying the activate Windows watermark can provide a more permanent solution. You can effectively remove the watermark from your screen by creating a batch file and running it as an administrator. This method offers a quick and efficient way to eliminate the activate Windows notification and enjoy a watermark-free experience on your Windows 10 device.
Frequently Asked Questions
1. How Can I Remove the “Activate Windows”Watermark Permanently Without Purchasing the Product Key?
You can try a few methods to permanently remove the ‘Activate Windows’ watermark without purchasing the product key. First, you can use a software called KMS Auto Lite, which can activate your Windows 10 without needing a product key.
Another option is to use a tool called KMSPico, widely known for activating Windows without a product key.
Remember that using these methods may violate Microsoft’s terms of service, so proceed with caution. It’s always recommended to purchase a genuine product key to support the developers and ensure the legality of your software.
2. Is It Possible to Remove the “Activate Windows”Watermark Using the Registry Editor?
Using the registry editor is a fantastic way to remove that pesky ‘activate windows’ watermark once and for all.
By making a few simple tweaks to the registry, you can wave goodbye to that annoying reminder. Just be careful though, as editing the registry can have some serious consequences if not done correctly. So, make sure you follow a reliable guide and proceed with caution.
With the power of the registry editor, you’ll feel like a superhero, effortlessly vanquishing that unwanted watermark from your desktop. It’s a game-changer, a miracle worker, and the answer to all your prayers.
So go ahead, dive into the world of the registry editor, and banish that ‘activate windows’ watermark to the deepest depths of oblivion.
3. Can the “Activate Windows”Watermark Be Removed With the Windows Powershell?
Yes, the ‘activate windows’ watermark can be removed using the Windows PowerShell. You can get rid of the watermark permanently by following a few simple steps.
First, open the PowerShell as an administrator. Then, type in a command that’ll uninstall the product key associated with the watermark.
After that, restart your computer to apply the changes. Once your computer boots up again, the ‘activate windows’ watermark should no longer be visible on your desktop.
This method is a quick and effective way to remove the watermark without the need for any third-party software or complicated procedures.
4. How Do I Write a Notepad Script to Permanently Remove the “Activate Windows 10″Watermark?
You can write a simple Notepad script to remove the ‘Activate Windows 10’ watermark permanently. Don’t worry, it’s easier than you think!
Now, you might be concerned about the effectiveness of this method, but this solution works like a charm. Starting with the Current Question, open Notepad and type the following command: ‘echo off’.
Then, press enter and type ‘taskkill /F /IM explorer.exe’. After that, press enter again and type ‘explorer.exe’.
Save the file with a .bat extension, for example, ‘remove_watermark.bat’. Double-click the file to run it, and voila! Your ‘Activate Windows 10’ watermark will be gone for good.
It’s a simple and efficient way to remove the watermark and enjoy your Windows 10 experience without any distractions.
5. Is It Possible to Disable the Windows Tips, Tricks, and Suggestions to Remove the “Activate Windows”Watermark?
Disabling the Windows tips, tricks, and suggestions to remove the ‘Activate Windows’ watermark is possible. By accessing the Settings menu on your Windows 10 operating system, you can go to the System section and select the Notifications & actions tab. From there, you can turn off the option that says ‘Get tips, tricks, and suggestions as you use Windows.’ This will prevent the system from displaying any further tips or suggestions, including the ‘Activate Windows’ watermark. This ensures a more streamlined and uninterrupted user experience.
Conclusion
In conclusion, a few simple fixes can permanently remove the Activate Windows 10 watermark. By purchasing the product key, you can activate your Windows and get rid of the watermark.
Alternatively, you can use the Universal Watermark Disabler tool or disable the Windows tips, tricks, and suggestions to remove the watermark.
Another option is to use the Command Prompt to remove the Activate Windows watermark.
Lastly, you can kill the watermark process with a short Notepad script.
Getting rid of the Activate Windows watermark is like a breath of fresh air for your desktop. Just as a clear sky after a storm brings a sense of calm and tranquility, removing the watermark allows you to enjoy your Windows 10 experience without distractions.
So follow these fixes, and let your desktop shine without the reminder to activate your Windows.