
With the digital age has come an exponential increase in the amount of information available at our fingertips. Long, vertically scrolling webpages, documents, conversations, and media are ubiquitous across our laptop and desktop screens. While ordinary screenshots allow capturing visible interface elements, they fall short when dealing with content extending beyond the display viewport.
This is where scrolling screenshots prove invaluable. Also known as long screenshots, scrolling captures allow stitching together multiple standard screenshots to record the entire length of lengthy, scrolling content as a single unified image. Scrolling screenshots empower users to save full web articles, social media threads, chat histories, troubleshooting logs, wireframes and more for convenient archiving, reference or sharing.
On Mac computers, users have access to built-in tools like Shift + Command + 5 and QuickTime for straightforward scrolling screenshot generation. However, dedicated third party apps like Shottr, Snagit, and Greenshot offer advanced options through features like automated full page scrolling captures, integrated sharing, annotating and editing capabilities. When enabled through settings configuration, these apps allow grabbing lengthy screenshots via automated or manual scrolling. Segmented screenshots then get stitched into one tall image for seamless full page and long document captures.
For optimal results, users should scroll carefully, disable ad blockers, check app settings, and ensure pages fully load before taking scrolling screenshots. The finished stitched images can then be cropped, edited, locally saved, shared via url or directly uploaded to cloud-based collaboration tools. Scrolling screenshot capabilities transform tedious multi-image capture and assembly into convenient one-click unified saves of otherwise cumbersome long content.
While built-in Mac tools work reliably, third party alternatives cater to power users with time-saving automation, productivity-enhancing annotations and seamless cloud sharing. With the surge of vertically scrolling webpages and messaging apps, scrolling screenshots are a vital tool for effortless archiving of long-form content, social media histories, critically tracking issues and more as unified images that preserve details the limited screenshot field of vision cannot. This comprehensive guide covers the fundamentals of scrolling screenshots and delves into accessible methods for activation on Mac platforms.
What is a Scrolling Screenshot?
As the name suggests, a scrolling screenshot captures an entire scrolling area by stitching together multiple screenshot images vertically.
For example, if you wanted to capture a tall web page, document, online chat or other content that extends beyond the height of your screen, you would need to:
- Take one screenshot of the top part of the page
- Scroll down to expose more of the content
- Take another screenshot of the newly revealed section

- Repeat the scrolling and screenshot process until the end of the content
- Stitch all the individual screenshots together into one tall composite image
This lets you capture the entire length of scrolling content as a single continuous image, rather than just what is visible in one screen view.
Why Take Scrolling Screenshots?
Here are some common reasons and use cases for capturing scrolling screenshots on your Mac:
- Save entire web pages – Preserve articles, guides, or references for later viewing or sharing.
- Record conversations – Capture long chat threads, messaging histories, and email exchanges as one file.
- Presentations and documents – Share lengthy Google Docs, Sheets, PDFs, and slides as one image.
- Social media threads – Screenshot scrolling feeds like Twitter conversations.
- Tech support and bugs – Capture details for long error logs, code snippets, or settings.
- Design mocks and wireframes – Create tall composites of your designs and prototypes.
- Signing documents – Record long legal agreements or contracts before signing.
Scrolling screenshots enable saving and sharing complete content that is too long for a single standard screenshot.
How to Take Scrolling Screenshots on Mac
MacOS offers a couple of straightforward built-in methods to grab scrolling screenshots. You can also use third-party apps for added flexibility.
Using Shift + Command + 5
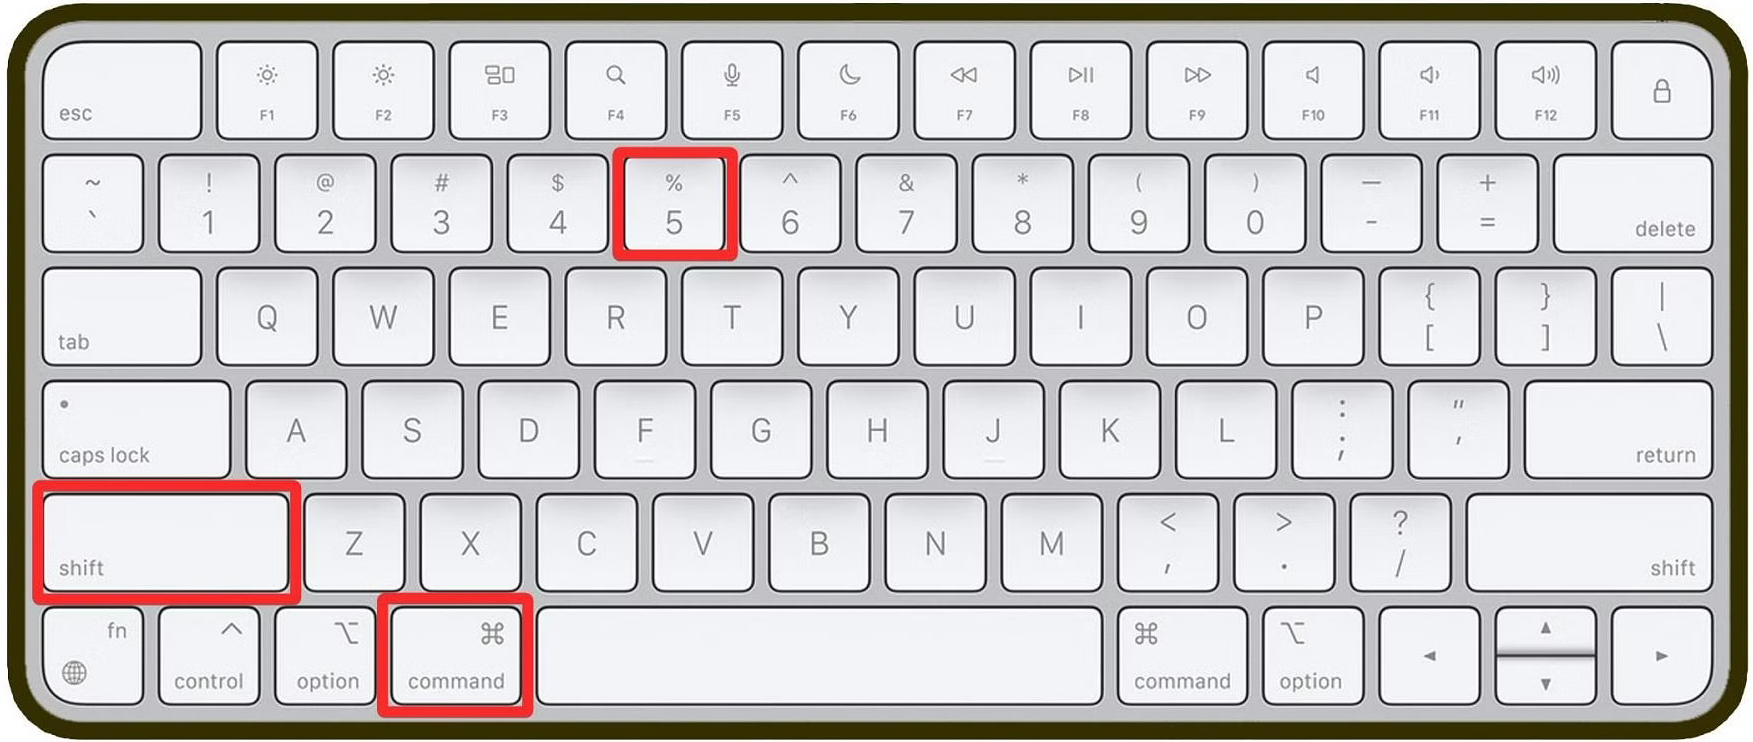
The Shift + Command + 5 keyboard shortcut is the fastest way to take scrolling screenshots on a Mac.
To capture a scrolling image:
1. Invoke the Screenshot toolbar – Press Shift + Command + 5 on your keyboard. The on-screen Screenshot toolbar will appear.
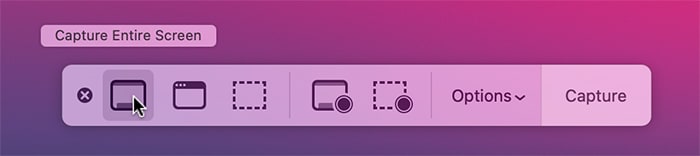
2. Select capture mode – Click the “Capture Entire Screen” button (camera icon) on the toolbar. This enters scrolling screenshot mode.
3. Scroll and screenshot – Scroll down your page or document, and the screenshots will be captured automatically as you go.
4. Finish capturing – Once you reach the end, click the “Stop Scrolling” button (square icon) on the toolbar. This will stitch the screenshots into one file.
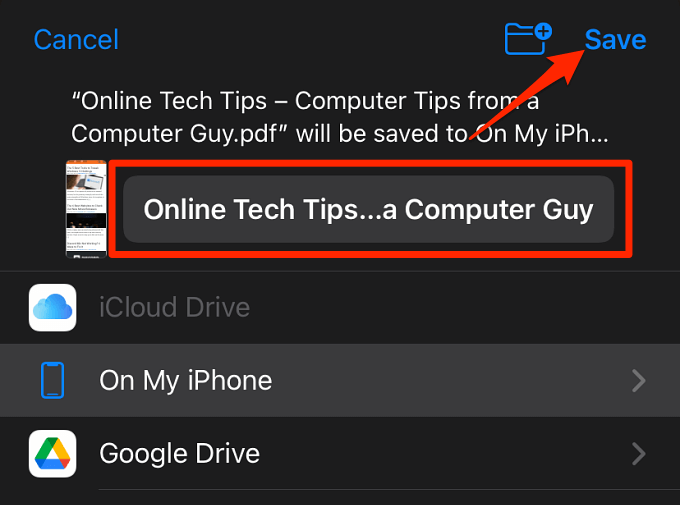
5. Preview and save – Your scrolling screenshot will open in the screenshot preview window. Click the Save button to save the image.
That’s all there is to it! Shift + Command + 5 provides Mac’s most integrated scrolling screenshot experience.
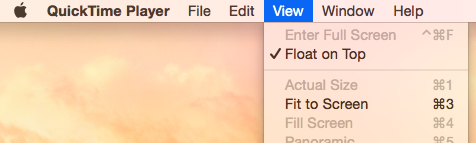
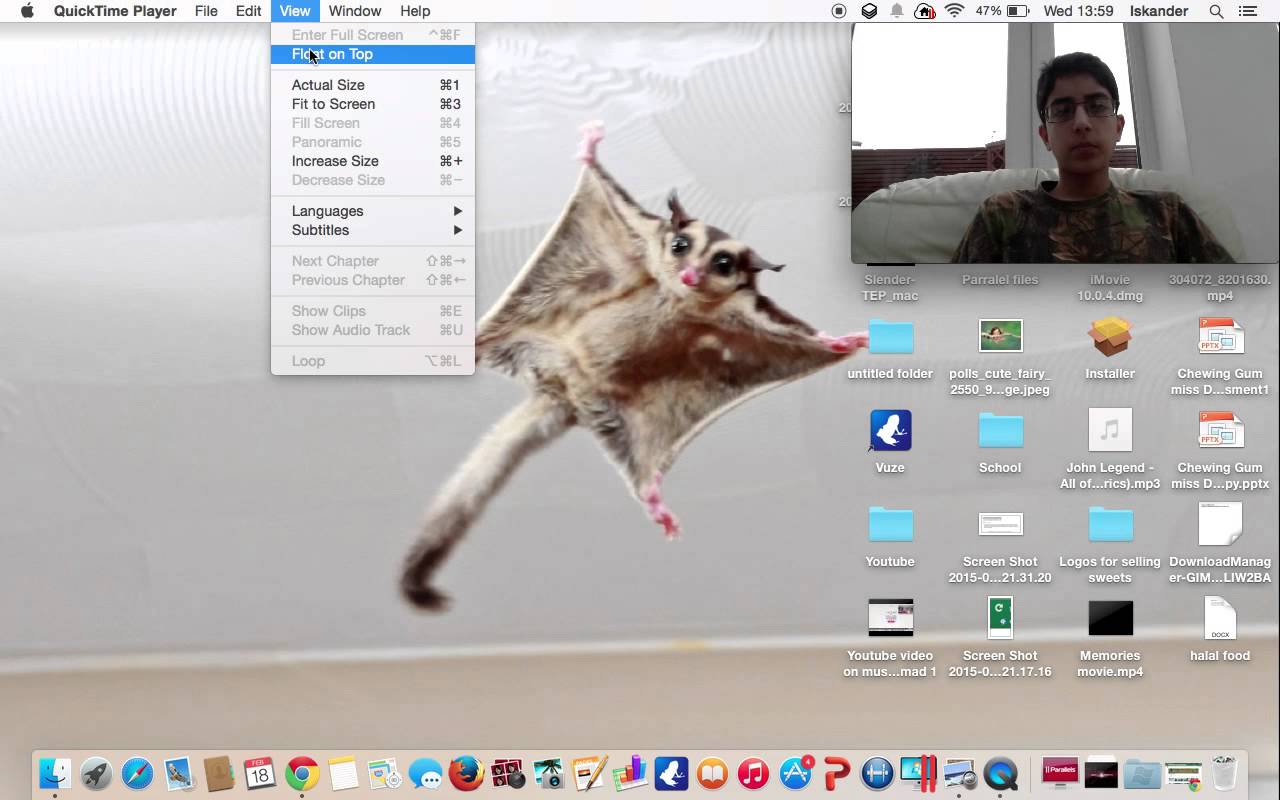
Using QuickTime Player
The QuickTime Player app bundled with MacOS also provides scrolling screenshot capabilities through its screen recording feature:
1. Open QuickTime Player – Launch the QuickTime Player app from your Applications folder.
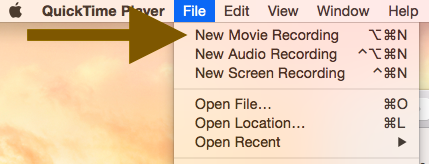
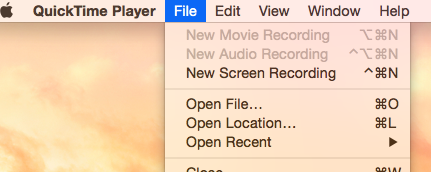
2. Start new recording – Click File > New Screen Recording in the menu bar.
3. Select capture – In the dropdown menu, choose to record the full screen.
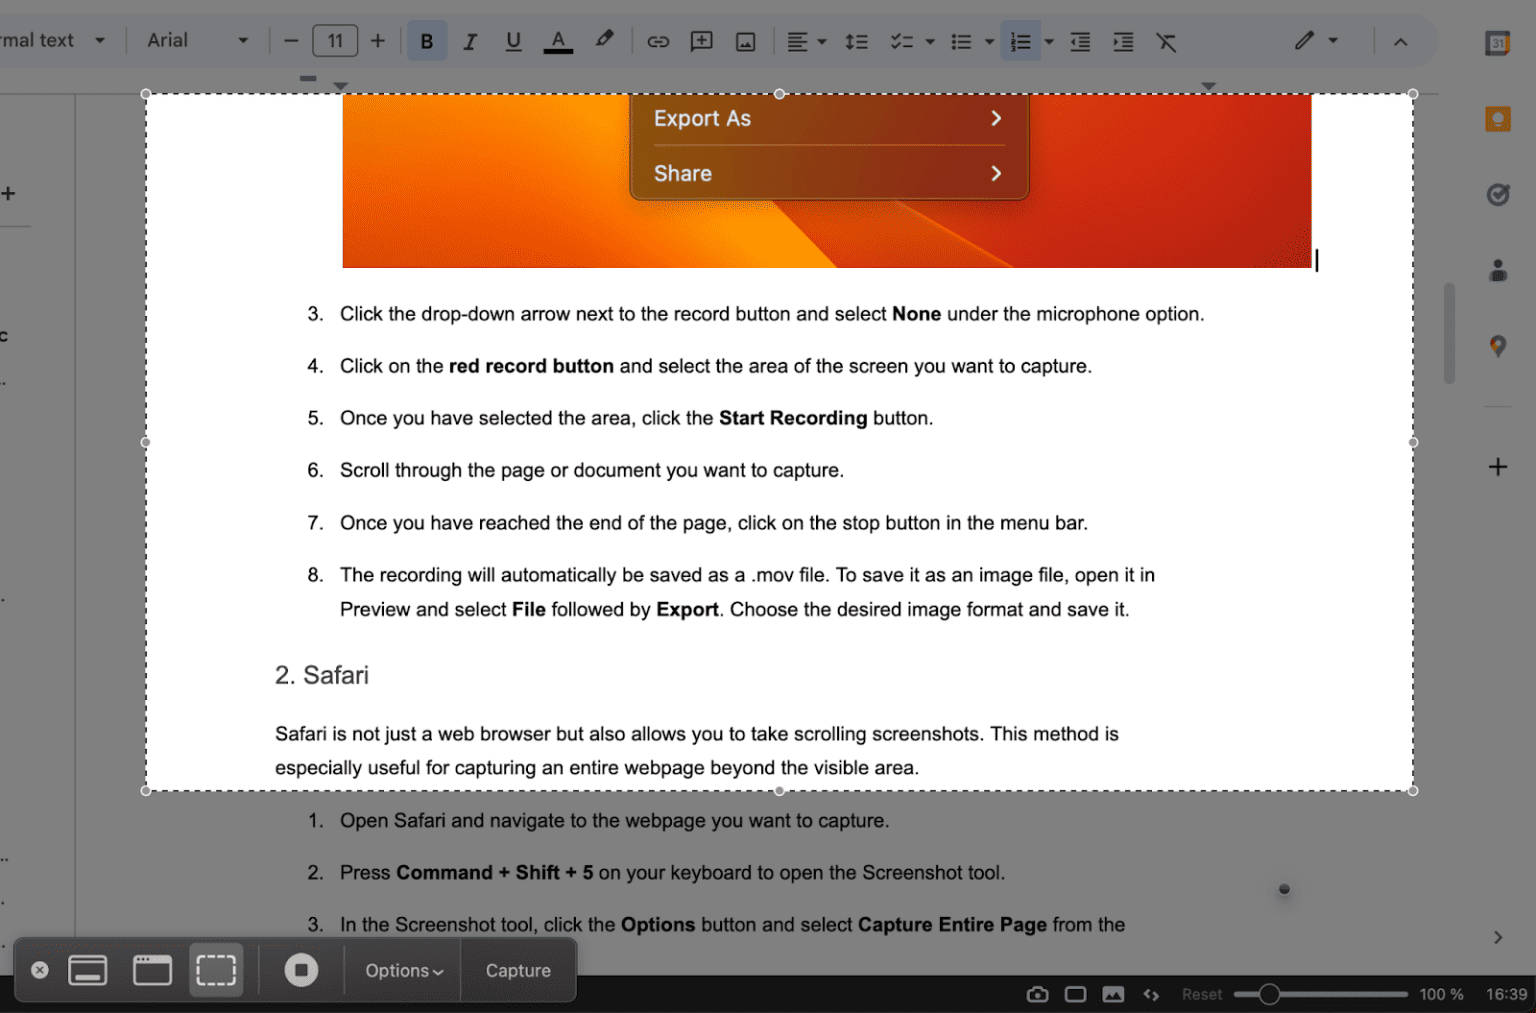
4. Begin recording – Click the red Record button and scroll through your content.
5. Stop recording – When you reach the end, click the Stop button in the QuickTime toolbar.
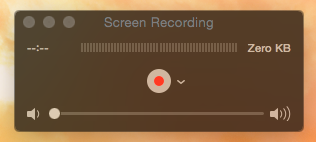
6. Save – Trim if needed, then click File > Save to save the screen recording. The video can also be exported as images.
While more convoluted than Shift + Command + 5, QuickTime Player works reliably as a built-in scrolling screenshot tool if needed.
Using Third-Party Apps
1. Shottr

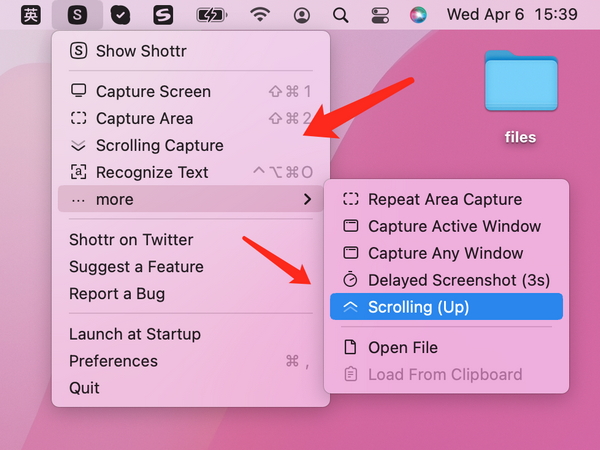
Shottr provides a straightforward way to capture entire pages or chats as unified scrolling screenshots on Mac. Its clean interface lets you swiftly select scrolling mode, click to start, manually scroll through the content, click stop, and automatically stitch the images into one tall screenshot.
The resulting long captures of webpages, documents, or messaging histories can be previewed, annotated, edited, saved locally, or shared instantly. Other handy features include webcam image capture, auto-uploading screenshots to the cloud, basic editing like cropping, and support for exporting in image, PDF or URL formats.
Overall, Shottr is a top free choice for easy full-length scrolling screenshots thanks to its minimalist yet powerful approach.
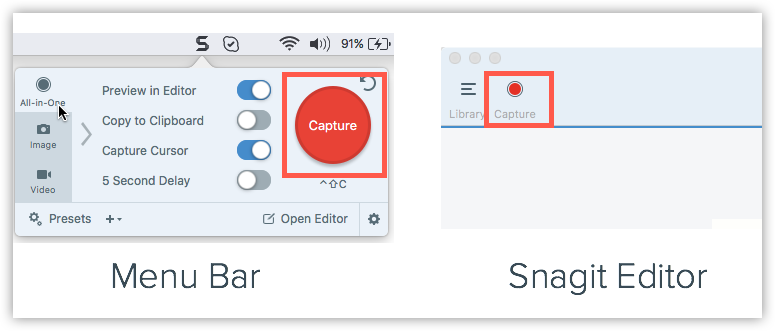
2. Snagit

Snagit provides extensive scrolling screenshot functionality with robust editing and sharing capabilities. Its smart automation lets you capture entire web pages with one click.
Scrolling screen videos can also be recorded. Built-in sharing tools facilitate quick collaboration. The advanced editor allows annotations, blurring sensitive data, resizing, cropping, and visual effects.
Extensive references provide custom configurations for power users. Templates enable consistency across teams.
Snagit requires a paid subscription after the free trial but offers premium support and cloud storage. Snagit is top choice because of the wealth of capture, editing, and sharing features.
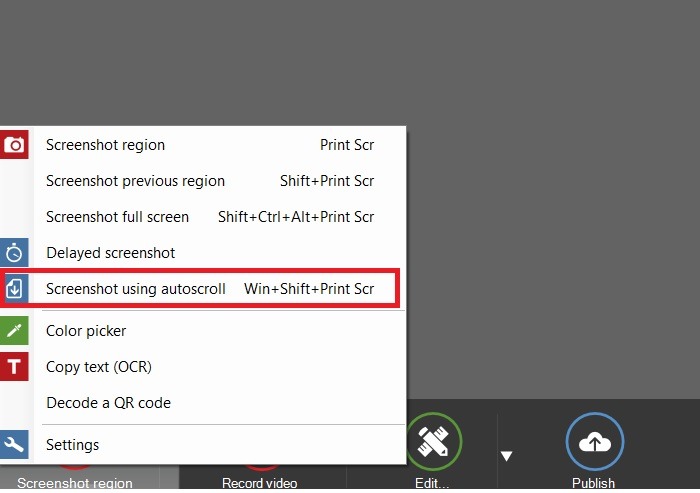
3. Greenshot
![]()
This free open-source app offers user-friendly scrolling screenshot capabilities for Mac. Hotkeys activate capture modes for scrolling windows or regions, allowing easy full-length grabs of webpages and documents. Scrolling can be automated or done manually.
The intuitive QuickMenu enables rapid access to frequently used tools. Screenshots are exported or opened in the built-in editor for annotating shapes, lines, and text. Images save locally or upload to external destinations like Imgur and Dropbox.
Greenshot’s straightforward approach, smart features and free cost make it a compelling choice for simple yet powerful scrolling screenshot functionality.
4. Monosnap

Monosnap streamlines capturing lengthy webpages, conversations, and documents as stitched-together screenshots on Mac. Its lightweight menu bar interface provides one-click access to start scrolling capture.
Intelligent detection automatically scrolls through and grabs entire page contents efficiently. Annotating and editing tools allow adding shapes, text, blurring info, and cropping. Screen recordings are also possible.
Captures can be saved locally, copied to the clipboard, or auto-uploaded for sharing. Monosnap also features cloud storage and team collaboration capabilities.
The integration, speed, automation features, and seamless scrolling screenshots cement Monosnap as a top choice.
5. Nimbus Screenshot & Screen Video Recorder

Nimbus is a cross-platform screenshotting tool that enables grabbing lengthy scrolling screenshots on Mac using a range of flexible options. You can auto-scroll and capture entire webpages or manually scroll and take screenshots segment-by-segment.
Draw tools allow annotating images with shapes, arrows, text boxes, and more. Screen recordings are also supported with audio narration. Finished captures can be directly copied to the clipboard, attached to email, or exported.
Nimbus includes a cloud dashboard for easy image sharing and storage. Paid monthly plans add capabilities like HD recording, unlimited storage, and priority support. Overall, Nimbus provides versatile scrolling screenshot functionality.
6. AweShot
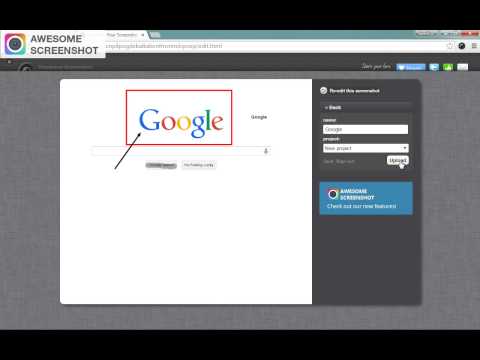
AweShot delivers straightforward scrolling screenshot capabilities on Mac with a clean and intuitive interface. Its menu bar controls make it easy to activate scrolling mode, whereby you manually scroll through a document or webpage while AweShot automatically captures screenshots.
Long captures of chats, articles, or documents can then be previewed, edited with annotations and shapes, and exported locally or directly to collaboration tools like Slack, Trello, and WordPress. Fast access customizable keyboard shortcuts are available for frequent actions.
Paid subscriptions unlock premium features like cloud storage, collaboration permissions, and analytics. For seamless scrolling screenshot functionality, AweShot is a solid choice.
7. Lightshot

Lightshot is a lightweight cross-platform screenshot tool that enables grabbing scrolling screenshots on Mac and Windows. After installing, you can launch Lightshot’s capture mode from the menu bar.
Scrolling mode lets you manually scroll through and screenshot lengthy webpages or documents segment-by-segment. Annotations like arrows, shapes, and text can be added before exporting locally or copying to the clipboard.
Your online Lightshot account enables sharing screenshots via URL. Paid Lightshot Plus subscriptions unlock advanced capabilities like automated scrolling, video capture, publishing to WordPress/Trello/Slack, and private galleries. Overall, Lightshot provides a capable free option for basic scrolling screenshot needs.
8. Skitch

Skitch offers scrolling screenshot functionality as part of its broader screenshot annotation toolkit. You must turn on the preference in Skitch’s settings to enable scrolling captures. This allows screenshotting tall webpages or documents, manually scrolling, and capturing segments, which Skitch automatically stitches into one long image.
Basic annotation tools let you add arrows, shapes, and text. Finished screenshots can be exported locally, shared via URL or sent to Evernote. Skitch also features built-in screen recording capabilities. While not as full-featured for scrolling captures as dedicated tools, Skitch provides the basics and its image annotation specialization.
Faqs About Taking Scrolling Screenshots on Mac Using the Provided Keywords:
1. How Do I Take a Scrolling Screenshot on Mac Using Keyboard Shortcuts?
The easiest way is to use Shift + Command + 5, which brings up the screenshot toolbar. Click the “Capture Entire Screen” button, then scroll through the page. Click “Stop Scrolling” when finished to stitch together the screenshots into one long image.
2. What is the Best Third Party App for Scrolling Screenshots on Mac?
Apps like Shottr, Snagit, and Greenshot offer advanced scrolling screenshot capabilities like automatically capturing full webpages in one click. They also include handy features like annotations, sharing tools, and cloud uploads.
3. Can I Take a Scrolling Screenshot on Mac of an Entire Messenger Conversation?
Yes, apps like Monosnap and Skitch enable scrolling screenshot functionality to grab an entire Messenger thread, chat history, or email chain as one continuous image when you manually scroll through and screenshot segment by segment.
4. How Do I Annotate and Edit a Scrolling Screenshot on Mac?
Tools like Snagit have robust built-in editors to allow annotating, blurring, cropping and adding visual effects to long scrolling screenshots. You can also use standalone image editors like Preview.
5. What is the Easiest Way to Share a Scrolling Screenshot From My Mac?
Apps like Greenshot and Lightshot have integrated sharing features to instantly upload scrolling screenshots to destinations like Imgur and Dropbox for quick sharing via URL. Snagit can also auto-upload captures to the cloud.
6. Can I Create a Scrolling Screenshot of a Figma File on My Mac?
Activate your preferred scrolling screenshot tool like Monosnap and manually scroll through your Figma file while capturing screenshots. The images will be stitched into one vertical screenshot, allowing you to share the entire design mockup or wireframe.
7. How Can I Quickly Find the End of a Webpage When Taking a Scrolling Screenshot?
Before starting the capture, quickly scroll to note the end point visually. Alternatively, use reader view, which often condenses web pages to one screen length, making it easier to screenshot fully.
8. What Causes a Scrolling Screenshot to Be Blurry?
Scrolling too fast while capturing can result in blurry screenshots. Scroll slowly and steadily when taking segmented screenshots to allow time for each clear screenshot image to be grabbed.
Conclusion
Scrolling screenshots provide a valuable way to capture long, vertically scrolling content that extends beyond your display’s viewport onto a single shareable image.
The Shift + Command + 5 keyboard shortcut offers the most straightforward built-in approach to generate scrolling screenshots on MacOS. QuickTime Player also provides screen recording capabilities that can be used to similar effects.
Third-party apps like Shottr and Snagit provide added scrolling screenshot functionality for power users. With the ability to grab full-length scrolling screenshots of web pages, chats, documents, and other content, you can conveniently preserve important records and conversations as unified files.
Now you know to start capturing and sharing scrolling screenshots on your Mac! Use them to save entire research papers, social media histories, troubleshooting logs, or any other long vertical content as unified images.