Setting up a VNC Server on Ubuntu opens the door to remote graphical desktop access, making server management and troubleshooting a breeze—even from across the globe. Whether you’re a developer, system admin, or just want to access your Ubuntu machine from your laptop or phone, this detailed, step-by-step guide will walk you through everything you need to know. Let’s get started!
Also Read:
How to Play PC Games on a TV
How to Make an App Portable
How to Change Port on CasaOS
How to Redirect SMS to Email
Why Did My Firestick Stop Working?
What is VNC Server?
VNC (Virtual Network Computing) is a remote desktop protocol that lets you control another computer’s desktop environment over a network. With a VNC Server running on your Ubuntu machine, you can interact with its graphical interface from anywhere using a VNC client. This is ideal for managing servers, providing remote support, or just accessing your files and apps when you’re not physically at your computer.
Prerequisites
Before you dive in, make sure you have:
- An Ubuntu server or desktop (Ubuntu 20.04, 22.04, or newer recommended)
- A user account with sudo privileges
- Internet connectivity
- A VNC client on your local machine (like RealVNC Viewer, TigerVNC Viewer, or TightVNC Viewer)
Here’s a quick comparison of system requirements:
| Requirement | Minimum | Recommended |
|---|---|---|
| Ubuntu Version | 18.04+ | 20.04/22.04 LTS |
| RAM | 1 GB | 2 GB+ |
| CPU | 1 Core | 2+ Cores |
| Disk Space | 10 GB | 20 GB+ |
| User Privileges | Sudo user | Sudo user |
Choosing the Right VNC Server for Ubuntu
Ubuntu supports several VNC server options. Here’s a quick rundown:
| VNC Server | Pros | Cons | Best For |
|---|---|---|---|
| TigerVNC | Fast, open-source, multi-platform | Manual security configuration | Linux power users |
| TightVNC | Lightweight, easy to set up | Fewer enterprise features | Home/SMB users |
| RealVNC | Feature-rich, enterprise security | Paid for full features | Businesses, teams |
| x11vnc | Shares existing X session | Not as robust for multiple users | Sharing live session |
For most users, TightVNC or TigerVNC paired with the Xfce desktop environment is a sweet spot for performance and simplicity.
Update and Prepare Your Ubuntu System
Let’s make sure your system is ready for the installation:
- Open a terminal (Ctrl+Alt+T or via SSH).
- Update your package list: bash
sudo apt update sudo apt upgrade - Install essential tools (optional): bash
sudo apt install wget curl nano
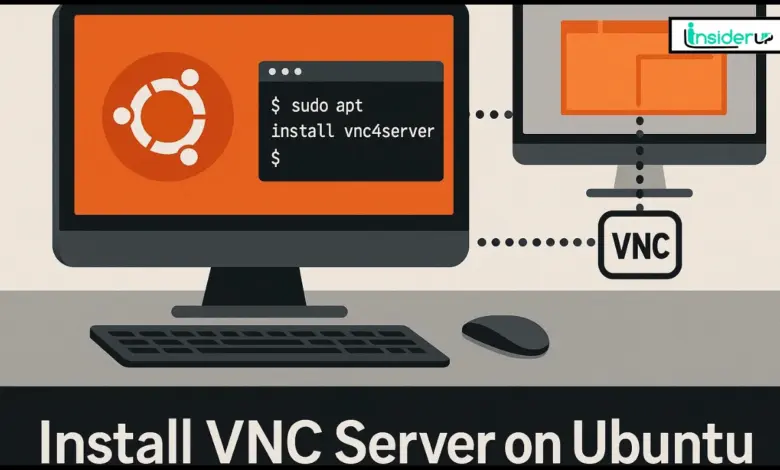
Installing a VNC Server on Ubuntu
We’ll use TightVNC in this example, but the steps are similar for other servers.
Step 1: Install the Desktop Environment
If your Ubuntu is running in headless mode (no GUI), you’ll need a desktop environment. Xfce is lightweight and ideal for remote sessions.
bashsudo apt install xfce4 xfce4-goodies
This installs the Xfce desktop and additional tools for a smoother experience.
Step 2: Install the VNC Server
bashsudo apt install tightvncserver
This command grabs the TightVNC Server from Ubuntu’s repositories.
Configuring the VNC Server
Step 1: Set the VNC Password
Start the VNC server for the first time to set your password:
bashvncserver
- You’ll be prompted to enter a password (6-8 characters).
- Optionally, set a view-only password for restricted access.
To change the password later:
bashvncpasswd
Step 2: Stop the VNC Server to Configure
Before customizing, stop the running VNC session:
bashvncserver -kill :1
Here, :1 is the display number (port 5901).
Step 3: Configure the Desktop Environment
Back up the original startup script:
bashmv ~/.vnc/xstartup ~/.vnc/xstartup.bak
Create a new xstartup file:
bashnano ~/.vnc/xstartup
Paste the following:
bash#!/bin/bash
xrdb $HOME/.Xresources
startxfce4 &
Save and exit (Ctrl+O, Enter, Ctrl+X).
Make it executable:
bashchmod +x ~/.vnc/xstartup
Setting Up the Desktop Environment
You can use other desktop environments like GNOME or KDE Plasma, but Xfce is recommended for speed and resource efficiency. If you want to try another, install it with:
- GNOME: bash
sudo apt install ubuntu-desktop - KDE Plasma: bash
sudo apt install kde-plasma-desktop
Set your preferred desktop as the default X session:
bashsudo update-alternatives --config x-session-managerStarting and Managing the VNC Server
Start the VNC Server
bashvncserverThis launches a new session (e.g., :1 for port 5901).
Manage VNC Sessions
| Action | Command |
|---|---|
| Start | vncserver |
| Stop | vncserver -kill :1 |
| List sessions | `ps -ef |
Auto-Start VNC at Boot
To run VNC automatically at system startup, add the following to /etc/rc.local before exit 0:
bashsu - your_username -c '/usr/bin/vncserver :1'Or, configure a systemd service for more robust management.
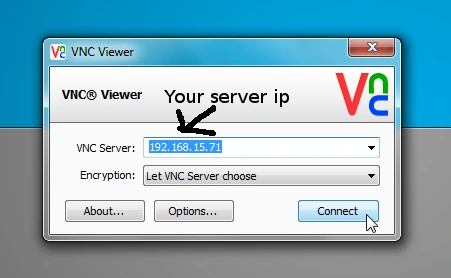
Connecting to the VNC Server
Step 1: Install a VNC Client
On your local machine, install a VNC client like RealVNC Viewer, TigerVNC Viewer, or TightVNC Viewer.
Step 2: Find Your Ubuntu Server’s IP Address
bashhostname -IStep 3: Connect
Open your VNC client and enter:
textyour_server_ip:5901or
textyour_server_ip:1- Enter the password you set earlier.
- You should see your Ubuntu desktop!
Securing Your VNC Connection
VNC traffic is not encrypted by default. For secure remote access, tunnel your connection through SSH.
How to Set Up SSH Tunneling
- On your local machine, run: bash
ssh -L 5901:localhost:5901 your_username@your_server_ip - Connect your VNC client to: text
localhost:5901
This ensures all VNC traffic is encrypted between your device and the server.
Firewall Configuration
Allow only local connections to the VNC port and block remote access at the firewall:
bashsudo ufw allow from 127.0.0.1 to any port 5901Security Best Practices Table
| Practice | Description |
|---|---|
| SSH Tunneling | Encrypts VNC traffic |
| Strong Passwords | Use complex, unique passwords |
| Firewall Rules | Restrict VNC port to localhost only |
| Updates | Regularly update VNC and OS |
Advanced Configuration and Tips
- Multiple Users/Sessions: Each user can run their own VNC session on a different port (e.g.,
vncserver :2for port 5902). - Custom Ports: Specify a different display number to avoid conflicts.
- Performance Tuning: Lower the desktop resolution or color depth for faster connections.
- Logging: Check
~/.vnc/*.logfiles for troubleshooting.
Troubleshooting Common Issues
Here’s a handy table for common problems and solutions:
| Problem | Solution |
|---|---|
| Connection refused | Check if VNC server is running; verify firewall rules |
| Black screen | Ensure desktop environment is installed and configured in xstartup |
| Port conflict | Use a different display number (e.g., :2 for 5902) |
| Authentication errors | Reset password with vncpasswd |
| Session not starting | Check logs in ~/.vnc/ and verify xstartup script |
| Cloud connection issues (RealVNC) | Enable cloud connectivity in RealVNC settings |
Uninstalling or Disabling VNC Server
To remove TightVNC:
bashsudo apt remove --purge tightvncserver
sudo rm -rf ~/.vnc
Clean up any desktop environment if not needed:
bashsudo apt remove --purge xfce4 xfce4-goodies
Frequently Asked Questions
Q1 : Can I use VNC with other desktop environments?
A: Yes! Install your preferred environment and update the xstartup script accordingly.
Q2 : Is VNC secure?
A: Not by default. Always use SSH tunneling and strong passwords.
Q3 : Can multiple users connect at once?
A: Yes, each user can start their own VNC session on a unique port.
Q4 : How do I change my VNC password?
A: Use the vncpasswd command.
Conclusion
Setting up a VNC Server on Ubuntu is a fantastic way to unlock remote desktop access and manage your system from anywhere. By following this guide, you’ve learned how to install, configure, secure, and troubleshoot your VNC setup. Whether you’re using TightVNC, TigerVNC, or RealVNC, the process is straightforward and adaptable to your needs.